
Item Creator
The Item Creator app makes it possible to create items from frontend.
Since item types are very flexible content templates, this means that you can use the item creator for almost any scenario you can imagine, involving user input.
For instance, you can use the Item Creator app to:
- Allow users (or some user groups) to create blog posts – or newsletters
- Submit and react on contact forms of all kinds
- Enable editors to create and maintain calendar events
- Etc.
Before using the Item Creator app you must have one or more item types created and configured.
Item Creator settings
To get started with the Item Creator, add the app to a paragraph on a page - this will give you access to the app settings, which are used to control the behavior of this instance of the app.

Data settings
The data settings control what the app does with the data provided by you and by your users when you create items.
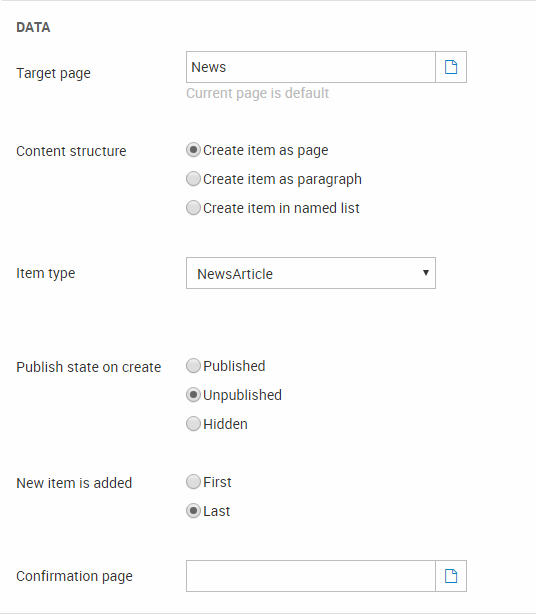
You can:
- Select a target page for the created items. Pages are created as subpages to the target page, paragraphs are created on the page, and item list items are created in a named item list under the target page.
- Select a content structure – i.e. decide if you want to create pages, paragraphs, or items in a named item list.
- Select the item type the app should use as a template for item creation. Only items which match the content structure can be selected.
- If your content structure is named item list, you can select any named item list which has been added to Page > Properties > Item lists
- If your content structure is paragraph, you have the option of selecting a content placeholder to create the paragraph item under
- Select the publish state for a newly created item – published, unpublished or hidden.
- Decide if the new item should be added first or last on creation.
- Specify a confirmation page to redirect users to. Default is the page with the app attached.
Item creator template
The layout when creating items using the item creator is controlled by the Create template(Figure 4.1).
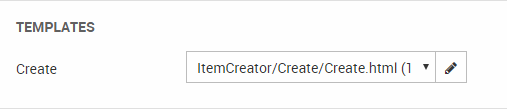
The item creator templates are located in Files/Templates/ItemCreator/Create/.
Receipts & Form emails
The Form save events settings (Figure 5.1) provide you with an easy way to send receipts and form data by email.

Check either box to fold out the email settings (Figure 5.2), where you canfill in the email details and settings.
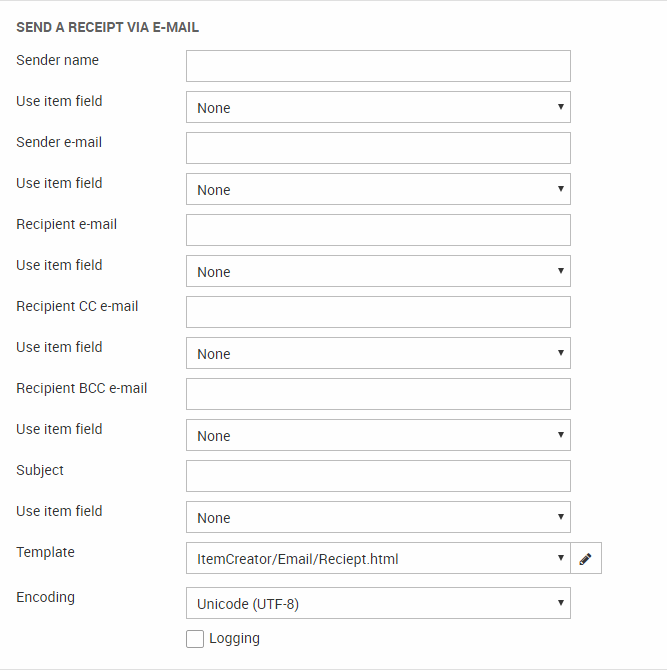
You can:
- Provide a sender name and email – or use the value from one of your item fields
- Provide a recipient email – or use the value from one of your item fields
- Provide a recipient CC and BCC email – or use the value from one of your item fields
- Provide a subject – or use the value from one of your item fields
- Select a template to use when rendering the email
- Select your encoding
- Enable logging, if you want to save a mail system log and a copy of the sent email. Logs and copies can be found in the /Files/MailLog folder