Starting a new project on DW with Rapido
When starting a project on Rapido, there are many things that are already given, so it is not necessary to build everything up from scratch. However, it can be a good idea to follow the steps below when starting on a new project, because some elements need to be in place before configuring something else or enriching products.
This guide is based on an empty Rapido 3.0 version (including Product Catalog app, cart flow, customer center, JSON feeds, and repositories) without products, preset languages, countries and currencies (except the default which comes with Dynamicweb).
It is also assumed that no products have been created yet. If you're not using the empty version or have some products with enrichment already, you may need to take extra precautions to avoid losing product information.
Step 1: Copy/Create a website
Rapido comes with different released versions. You can either choose to take the version with content and product examples or take the version that is “empty” (no content or product data but consists of the important item types and templates on Rapido).
If you use the version with content, you can simply copy an existing website.
If you use the "empty" version, you must create a new website.
Copy existing website
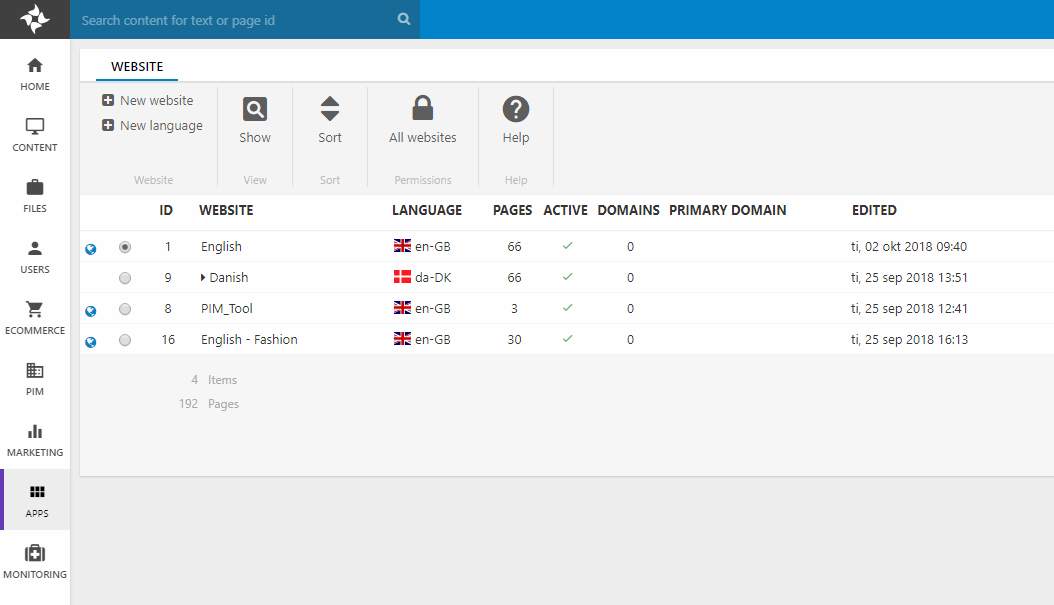
Go to the Apps area and click Websites (Figure 3.1).
Then, follow this guide to copy an existing website.
New website
Go to the Apps area and click Websites (Figure 4.1).
Then, follow this guide to create a new website.
Item type
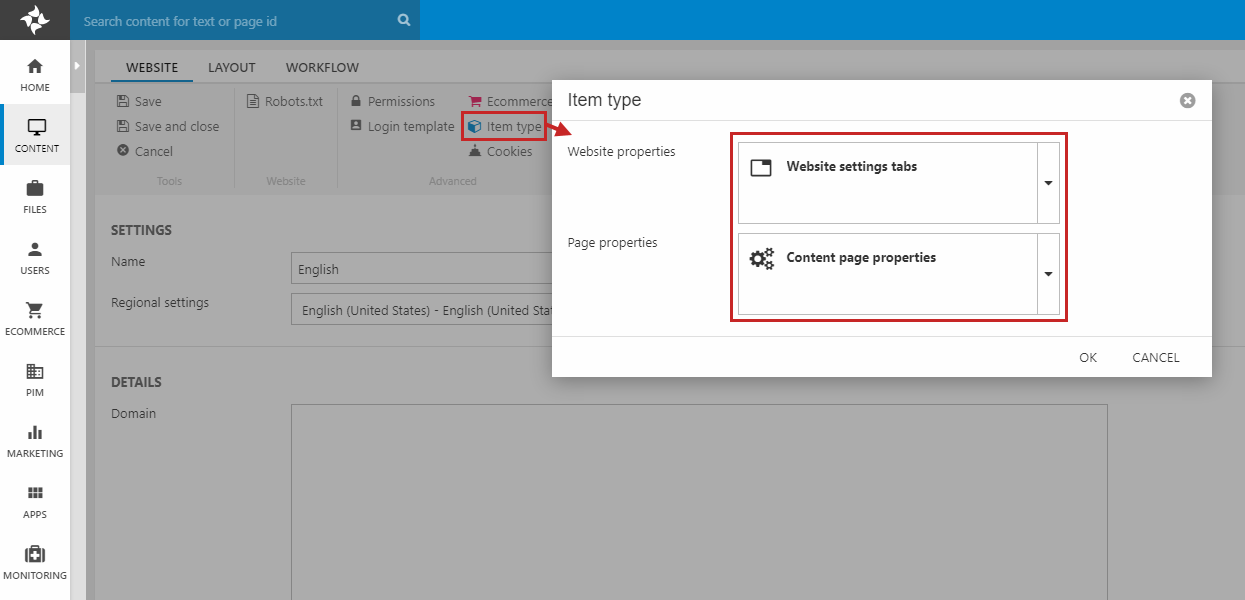
After you've either copied or created a website, go to the website settings and click Item type in the ribbon bar. Verify that the item types are set as in Figure 5.1:
- Website properties should have the Website settings tabs item type
- Page properties should have the Content page properties item type
Step 2: Set up the basics
Before you start enriching products on the wrong language or doing anything else, you must set up the basics. These basic setups are important to define from the beginning, since they will be used later on and you can avoid unnecessary clean-up on your data.
Delivery countries
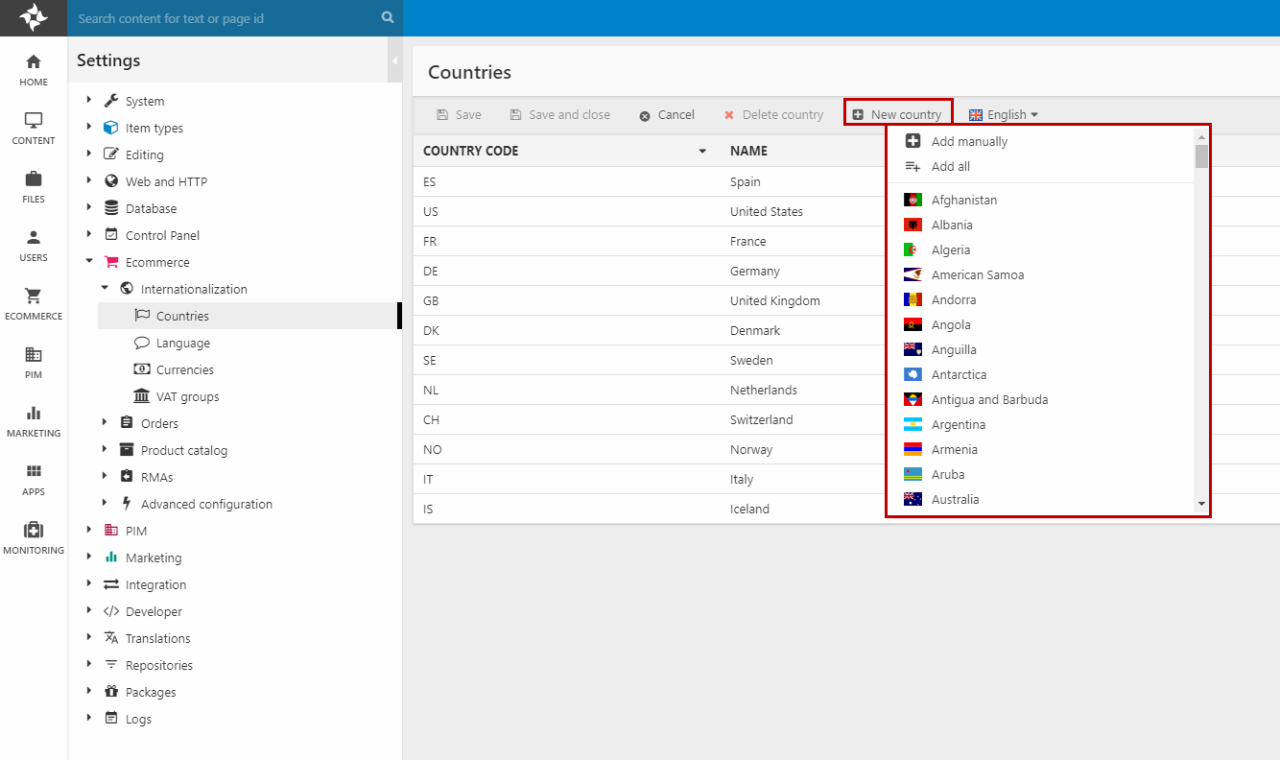
You need to define the countries to set up delivery and payment. This information is also needed later in the Website settings regarding Ecommerce setup.
Go to Settings > Ecommerce > Internationalization > Countries and if the country you want to add is not in the list, follow this guide to add a new country.
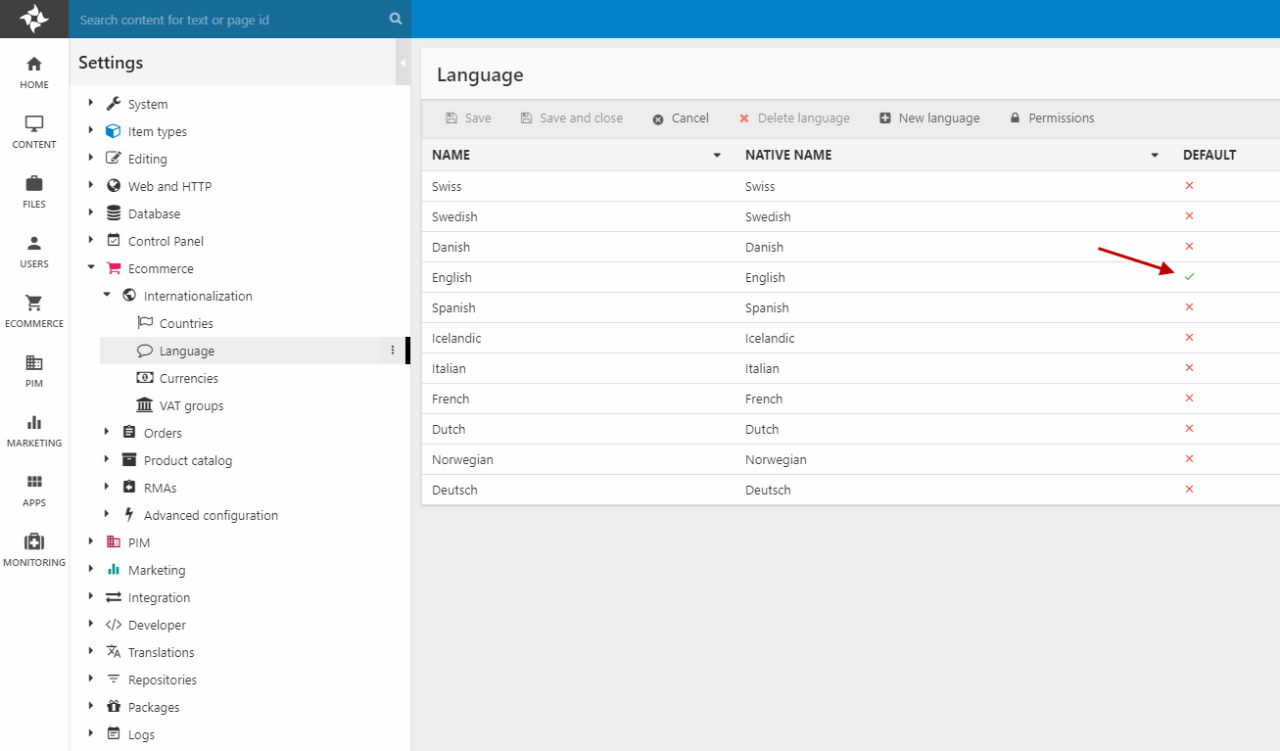
Default language
A default Ecommerce language needs to be defined from the beginning so when you create other languages, product field values will be inherited from the same place.
Assuming you haven't created any products yet, go to Settings > Ecommerce > Internationalization > Language. You can add as many languages as you'd like which you can use when localizing products, websites, content, and emails.
If your desired language is not in the list, follow this guide to add a new language. Otherwise, edit the language you wish to be the default language. When creating/editing the language, check the Default checkbox to make it your default language.
If you have already added products and product enrichment to the current default language but wish another language as the default, do not follow the procedure as described above, as it will force a localization of not translated products and groups which will be empty and you would need to fill out all information again.
Instead:
- In Settings > Ecommerce > Internationalization > Language, locate the current default language and edit it
- Change the name, country code and native name to fit your new language
- Save
All products that belonged to the previous default language will now remain intact and unchanged, but they will belong to your new country instead, as will future products.
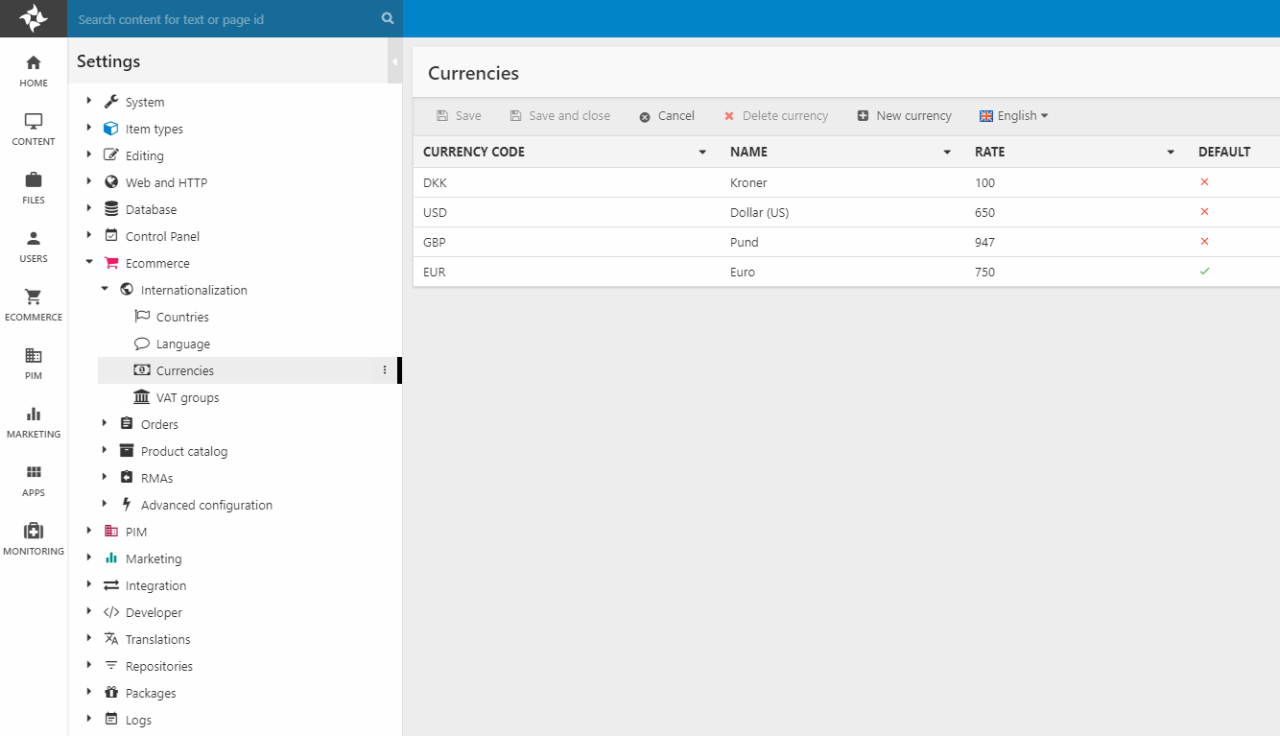
Currencies
The next step is to define the currencies that are needed on the website. Go to Settings > Ecommerce > Internationalization > Currencies and create the needed currencies using this guide. Set the default currency by checking the Default checkbox.
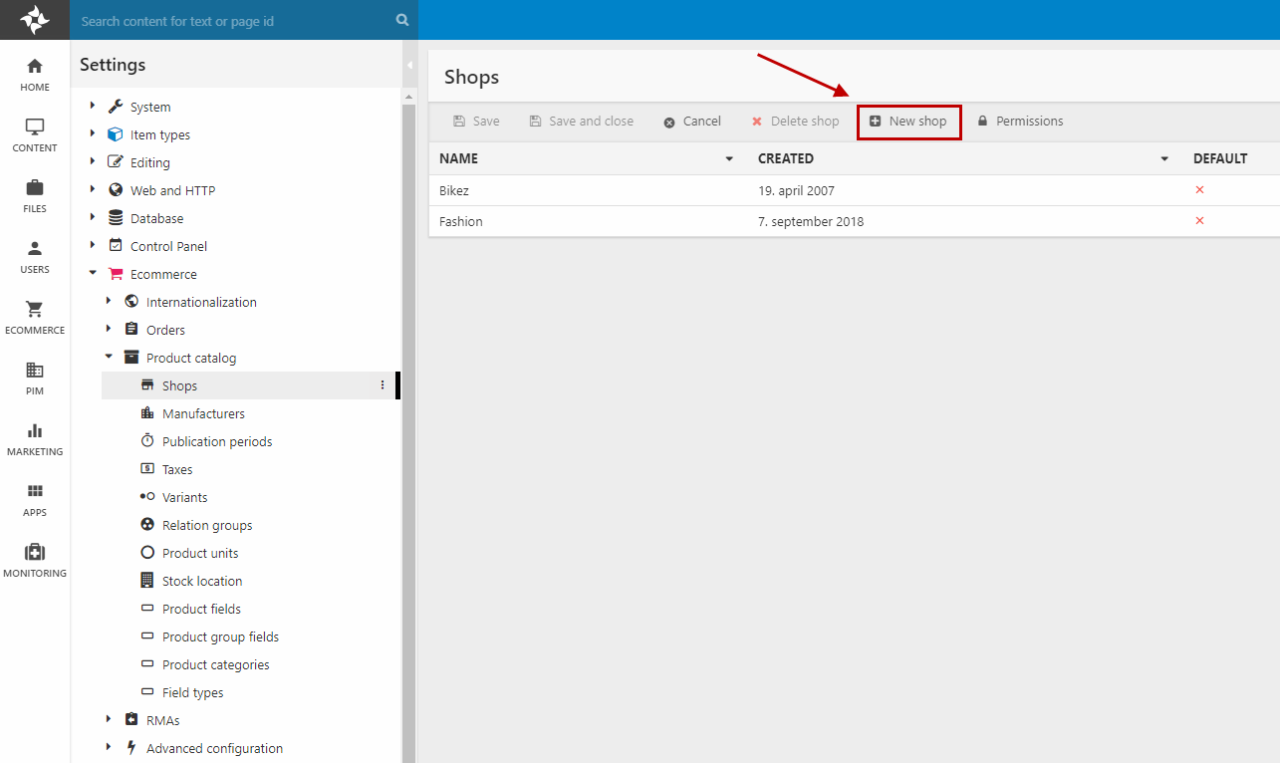
Ecommerce shops
Create your shop in Ecommerce in order to create the product structure you want to be presented in the frontend navigation. Go to Settings > Ecommerce > Product catalog > Shops and follow this guide to create a new Ecommerce shop.
Step 3: Create variant groups / units
If your products have variants or units, you should create the definitions for them, since you will need the definitions when adding variants / units in your Ecommerce shop.
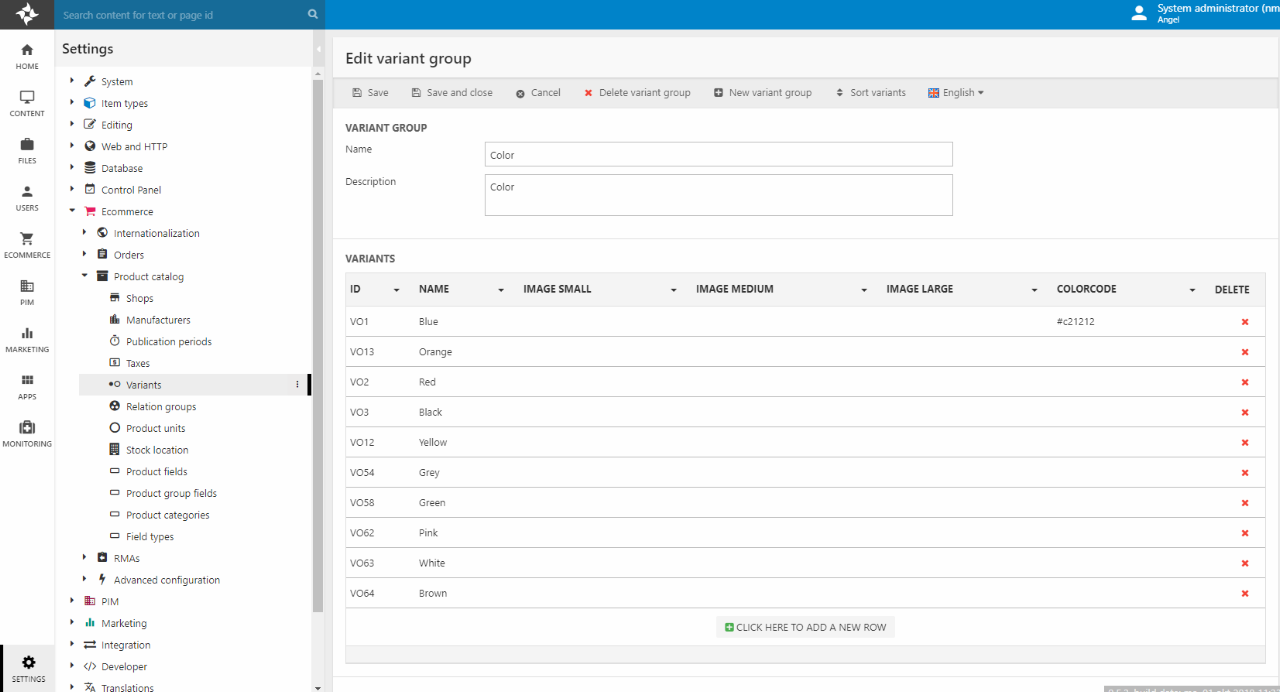
Variant groups
Create the variant groups and options that are needed for your products (e.g. colors or material) in Settings > Ecommerce > Product catalog > Variants. Follow this guide when creating variant groups.
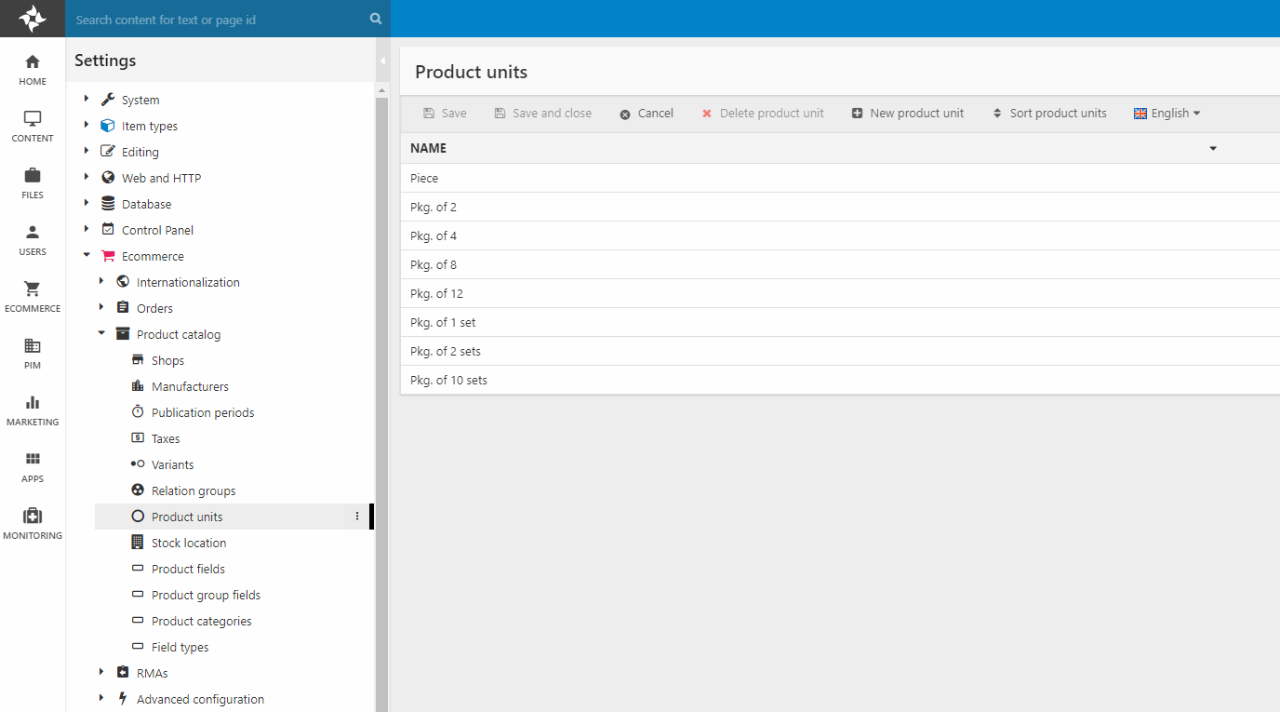
Unit definitions
Create the unit options that are needed to the different products in Settings > Ecommerce > Product catalog > Product units. Read about units and related rules regarding langauges here.
Notice that is not possible to create / work with units in PIM.
Step 4: Product (& product category) fields
Your products need to present some data in the product list and/or detail page. Therefore, you need to define which fields are needed and should be rendered in frontend.
Product fields
Product fields are a type of custom field which are added to all products e.g. brand or manufacturer, in addition to the standard product fields.
Set up the product fields that are needed in Settings > Ecommerce > Product catalog > Product fields. See this article for your different configuration options.

Product category fields
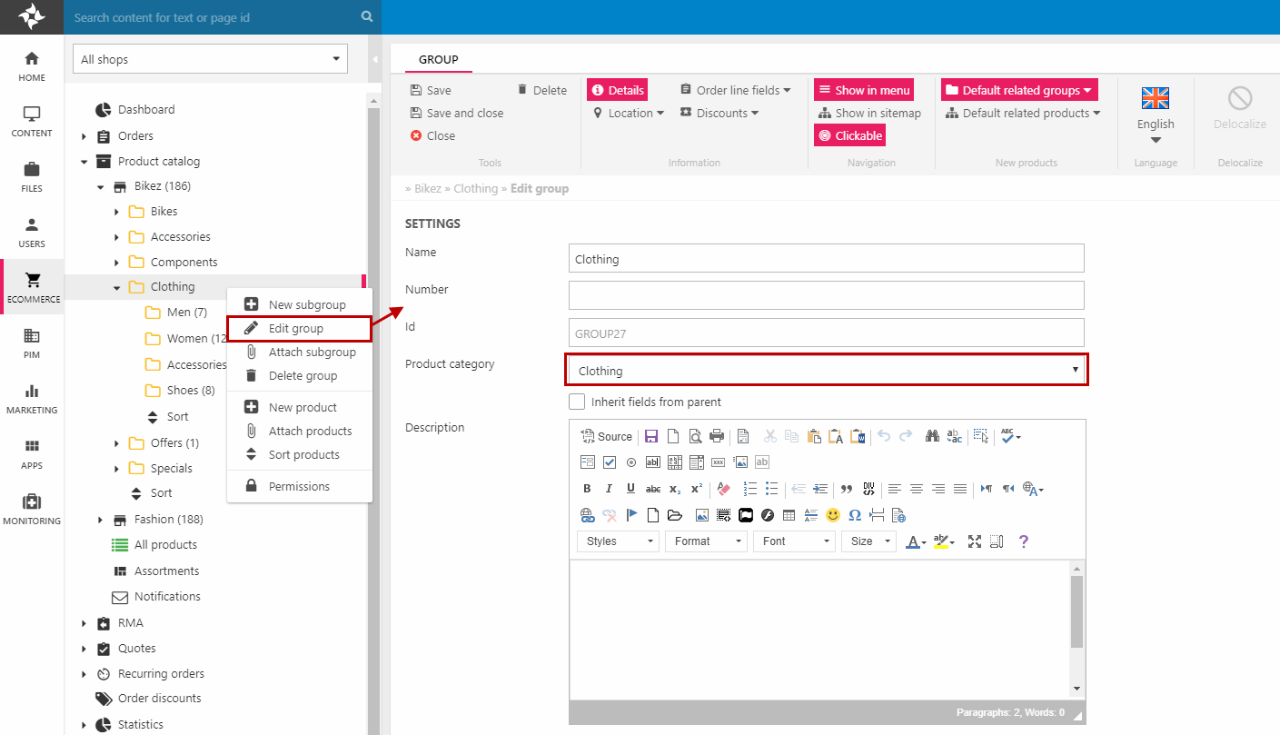
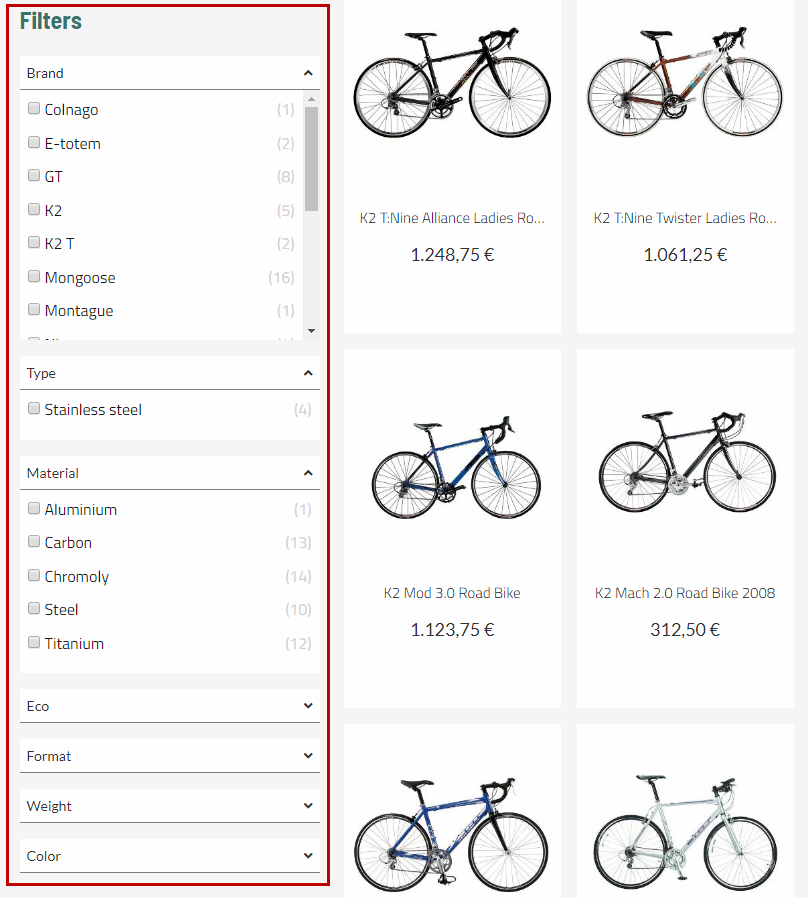
Product categories are assigned to product groups in Ecommerce. Each product category can contain some product category fields, which are tied to the product category and are only needed for a specific group e.g. a wheel type field for a Bikes group or a material field for a Clothing group.
The product category fields will appear when editing products inside a group that has the related product category assigned (Figure 16.1).
Start by creating your product categories and their product category fields:
- Go to Settings > Ecommerce > Product catalog > Product categories
- Follow this guide to create product categories and their fields (assigning the categories to product groups will be covered in the next step)

Step 5: Assign product categories to product groups
When the product categories have been created, they need to be assigned to the right product groups in the Ecommerce area.
Follow this guide to assign the product categories to your product groups. In the article, you can also read about managing inheritance from parent groups to subgroups.
Step 6: Create the product structure in PIM
Create your product structure in PIM with warehouses and warehouse groups based on how the client wants the flow of enriching the products to work – this is different from client to client.
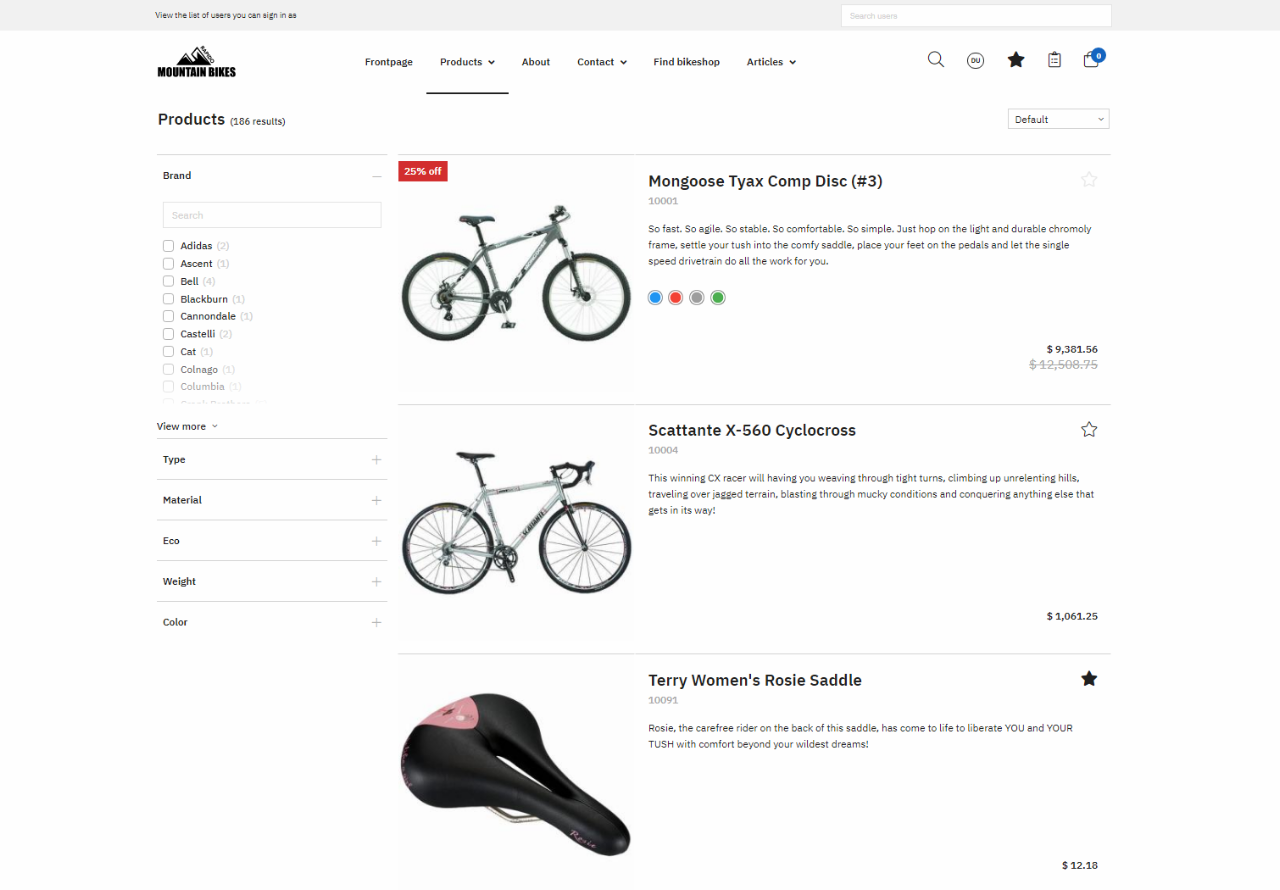
In Ecommerce (the frontend representation of your products), you may have your products sorted into categories e.g. for a bike shop: mountain bikes, road bikes, city bikes, etc.
In PIM however, you may make have your products sorted into manufacturers with each subgroup containing all the different types of bikes from the same manufacturer. This would make it easier to import products if you receive them from multiple manufacturers.
In most PIM setups, products are imported externally and placed in a group structure that reflects the external source. Other times, they are placed in a single group and then manually moved into a group structure in PIM.
Use this guide to create a warehouse and warehouse groups.
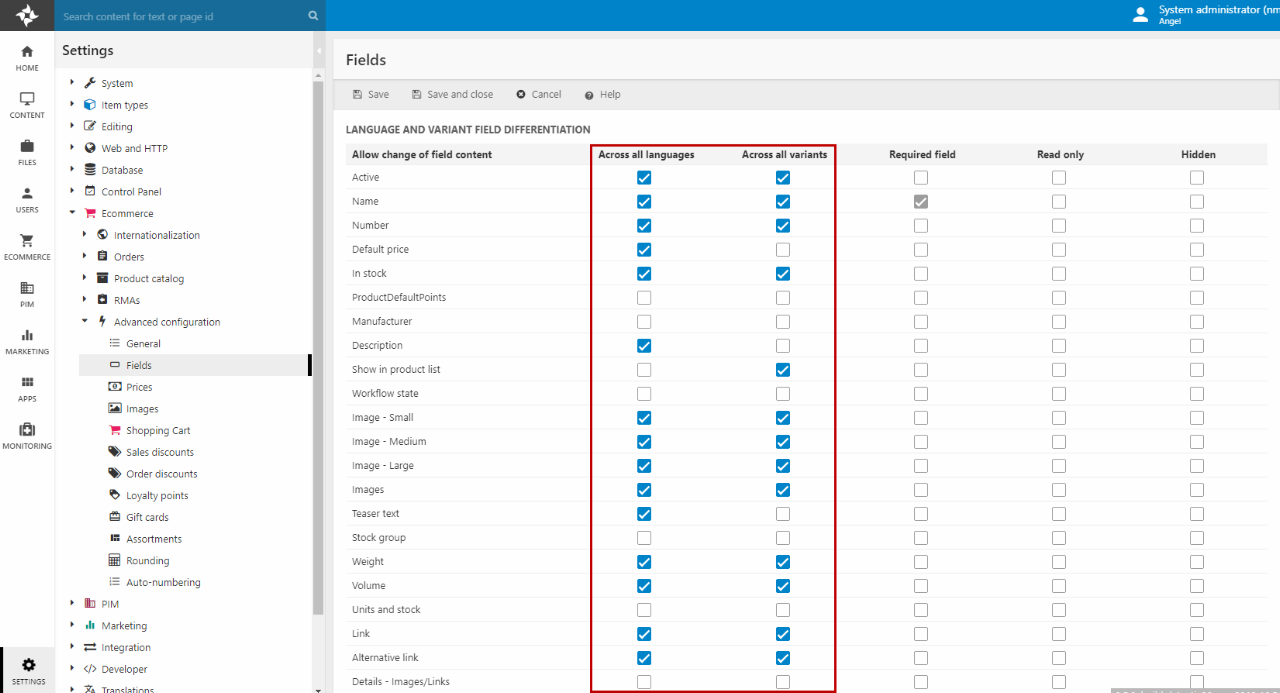
Step 7: Field settings
It is important to set up the field settings before enrichment, since they control variation and define how product information is inherited across the different languages and variants. This is especially important when importing products from an external source.
If the settings are not set up correctly before enrichment of the products, it can be a problem if you decide to change the field settings later, as information can be inherited in a wrong way or some fields can be reset and their information lost
This step is to avoid wasting time and cleaning up product information.
Go to Settings > Ecommerce > Advanced configuration > Fields and configure your field settings. You can also use this guide.
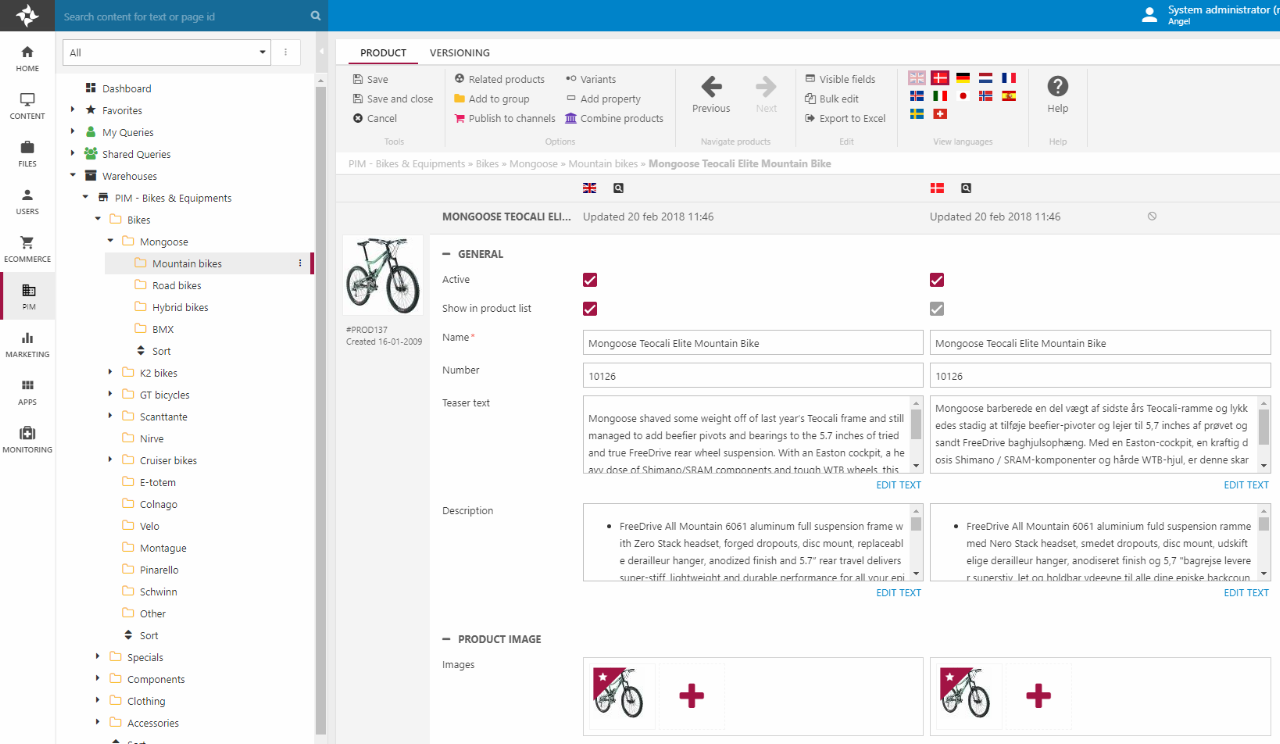
Step 8: Product enrichment (demo data)
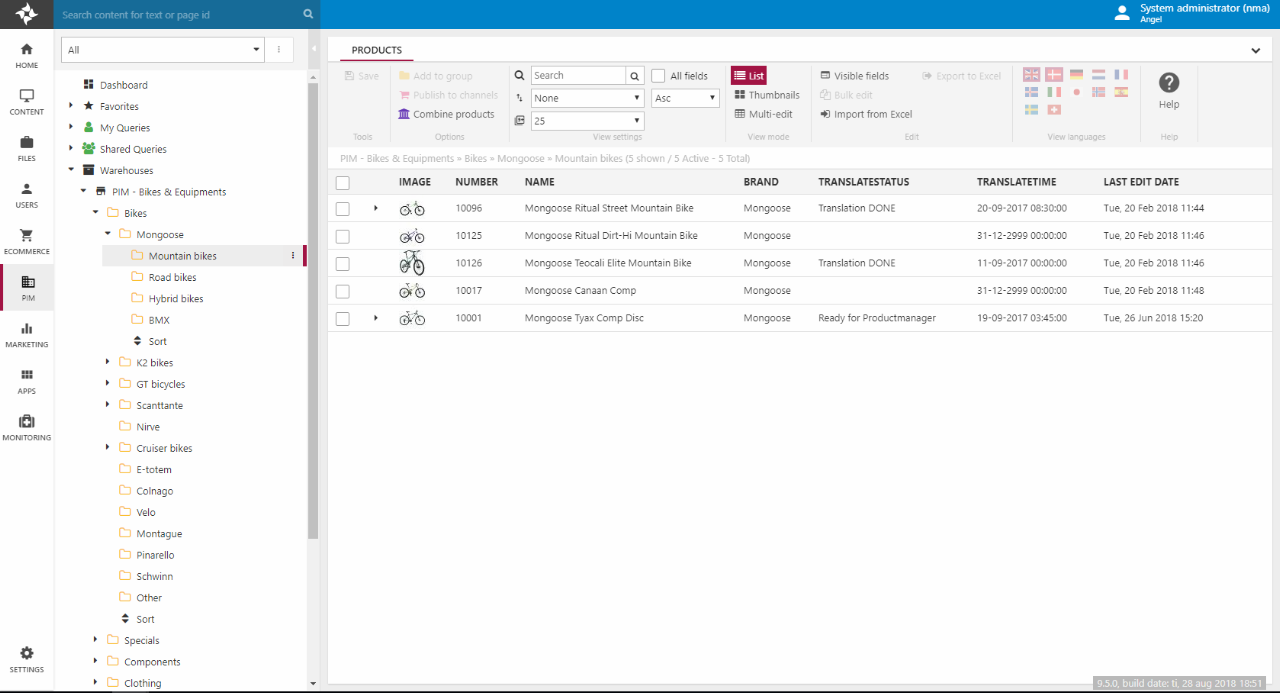
Enrich your demo products in your PIM product structure. You can use the different view modes and the bulk edit tool to enrich the different variants and language versions of your products.
Product enrichment
Enrich your demo products in PIM. Remember the following elements:
- Image
- Text (description, teaser)
- Translation if applicable multiple currencies / languages
- Price
- Product fields / product categories fields
Read this section about enrichment in PIM to ensure that you place the information correctly and in the right language. You can also read about the different view modes and the Bulk edit tool.
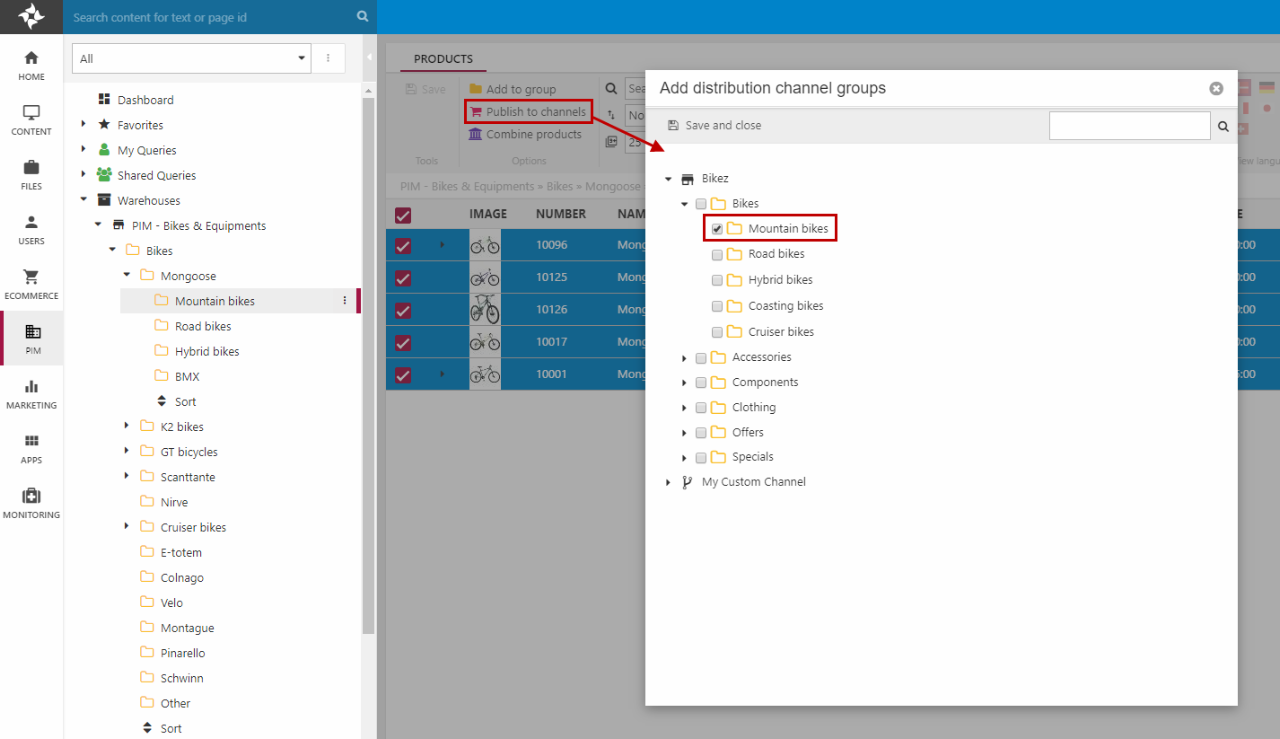
Publish to Ecommerce shop
Publish the products to the right product groups in the Ecommerce shop using the Publish to channels button in the ribbon bar.
Step 9: Repository
When you update your products, create new product (category) fields, localize products, or create variants, you must build your product index.
If you wish to add a facet for a product field, you must edit the product query and product facets to render the information in frontend.
Rapido already has a set up product index, query and facets.
Build your product index again
To see the new or edited product information in frontend, you must build the products indexes.
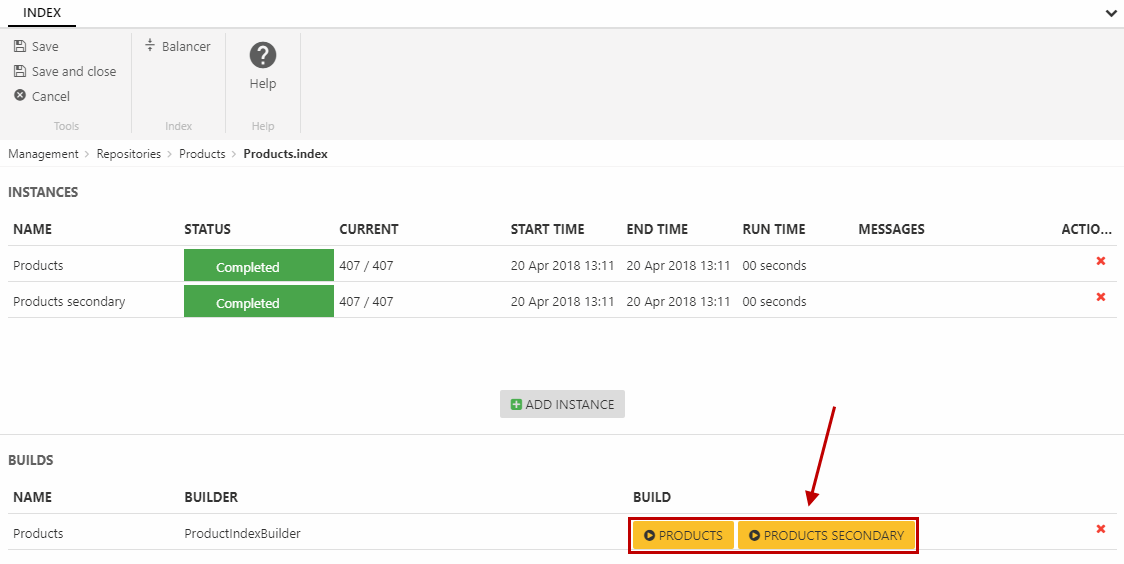
Go to Settings > Repositories > Products and open your Products.index (Figure 24.1).
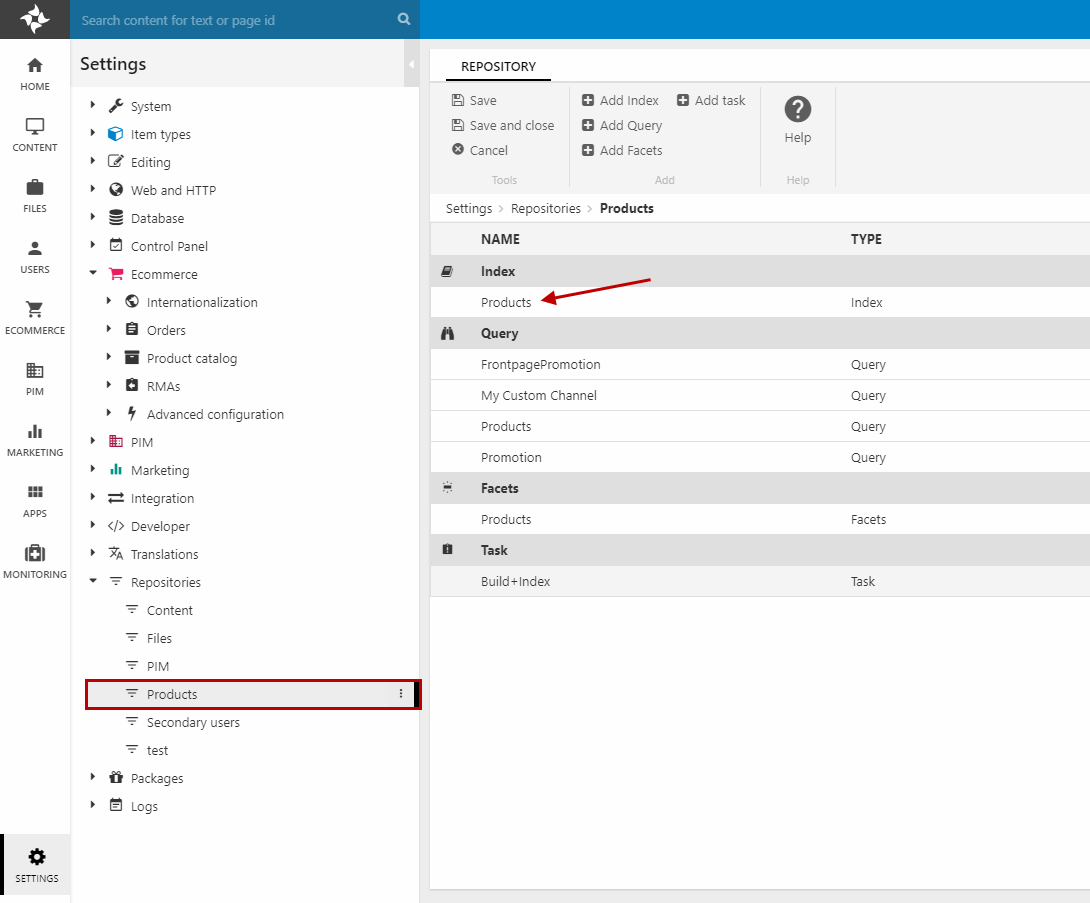
Then, click the yellow Build button for Products. When the build says completed, click the Build button for Products secondary (Figure 24.2).
Create new facets
If you've created a new product field and wish to create a facet to sort the products in frontend with regards to this field, you must edit your product query and facets with regard to using the proper product fields / product group fields needed for the new facets.
Go to Settings > Repositories > Products and follow this guide to edit your repository to include the new field in the product facets (you can skip the part about creating a new product field).
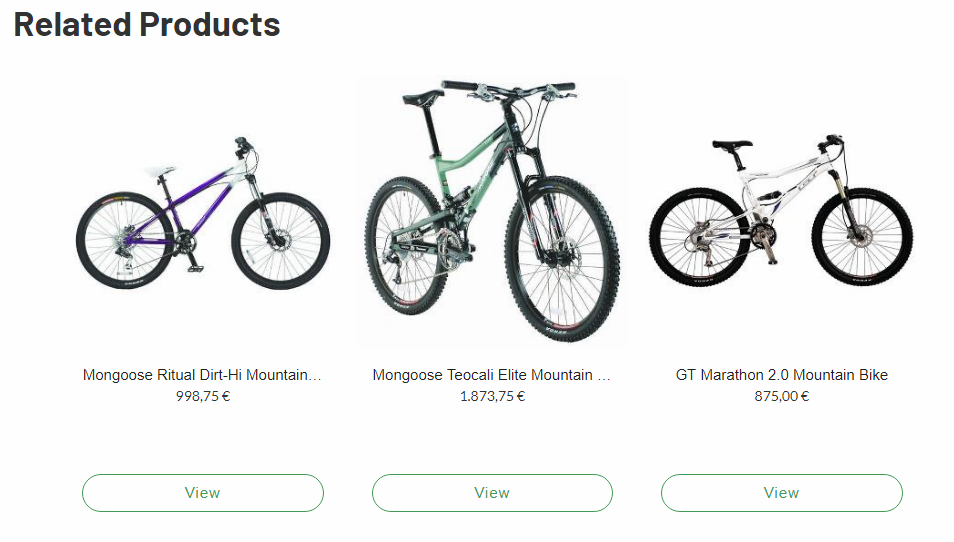
Setting up related products
Use the query to render a Related products section on the product card. The section can be used for e.g. "related products", "wheels for this bike", etc.
Follow this guide to set up Related products.
Step 10: Website settings
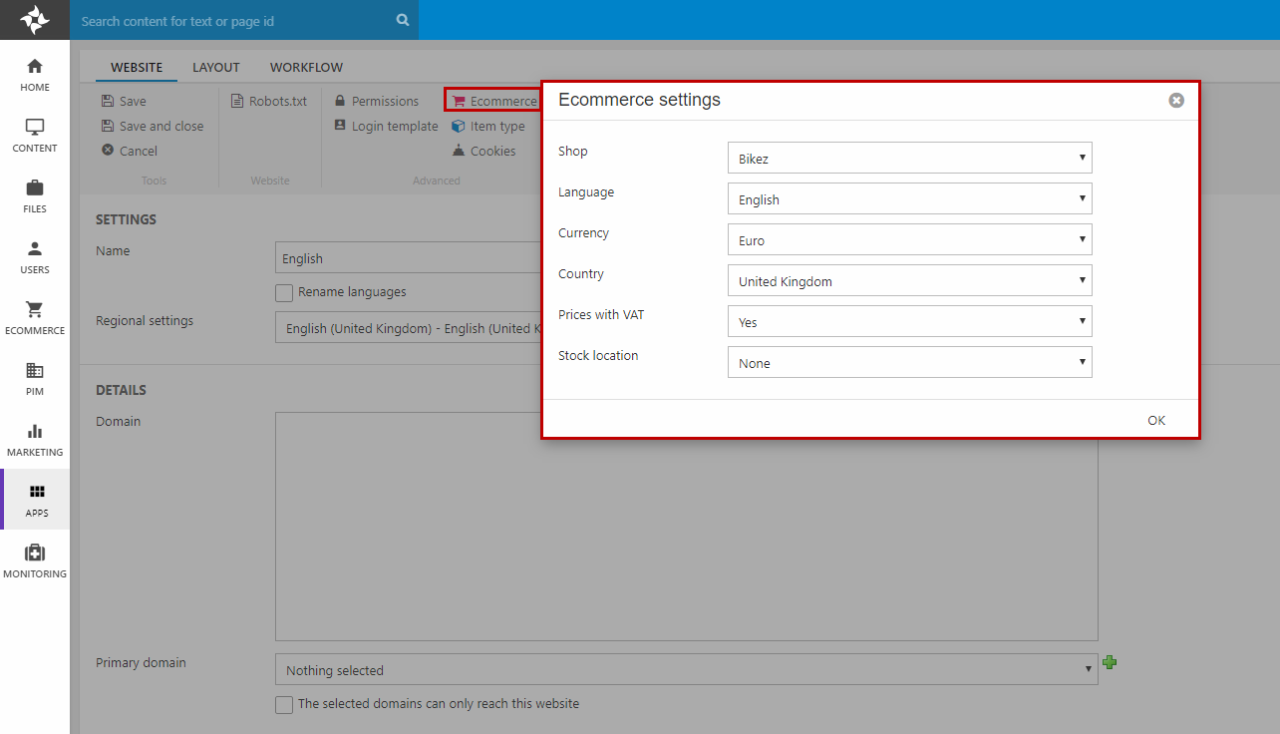
In the ribbon bar “Ecommerce” check that the proper: Shop, language, currency, country, Price with VAT and Stock location fields are selected.
Ecommerce
It is important to define the Ecommerce settings for your website.
Go to Apps > Websites and click your website. You'll be redirected to the website settings. Click Ecommerce in the ribbon bar to open the Ecommerce settings (Figure 28.1). Make sure that the proper standard is selected for: Shop, language, currency, country, price with VAT, and stock location.
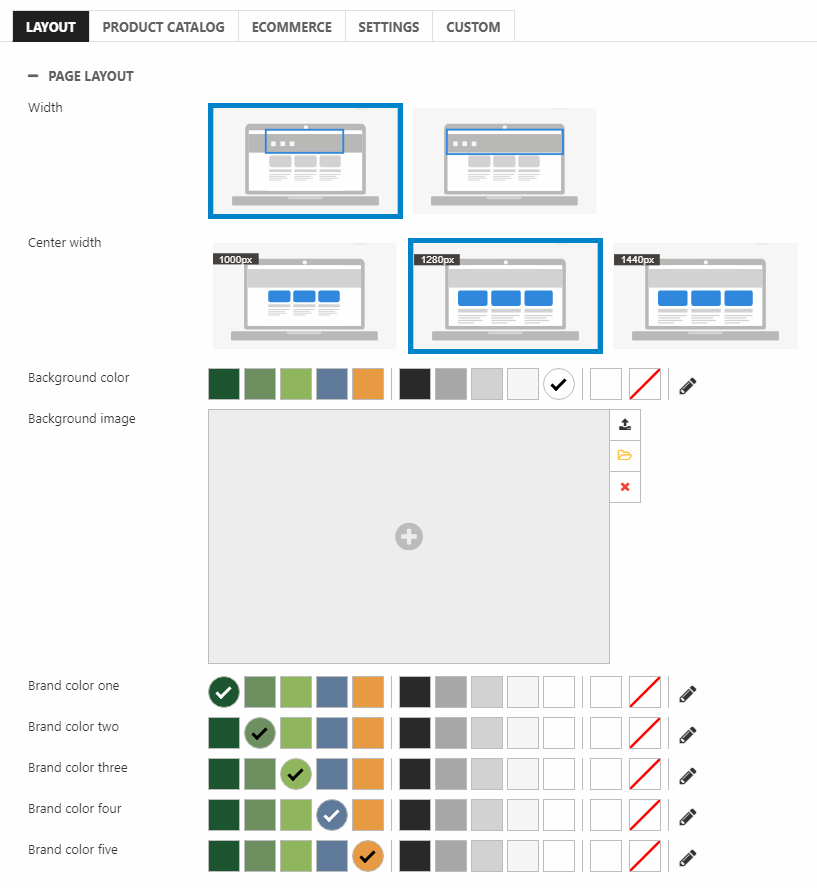
Design layout
Go through all the settings in website settings and select the layout for the website. See the Rapido documentation for the different configuration options.
Step 11: Product catalog page setup
When creating a product catalog page you must use the product catalog app. To ensure that the product list shows the products from the correct shop, this app must be setup correctly and you must configure the Navigation settings for the page.
See this article for creating the product catalog page.
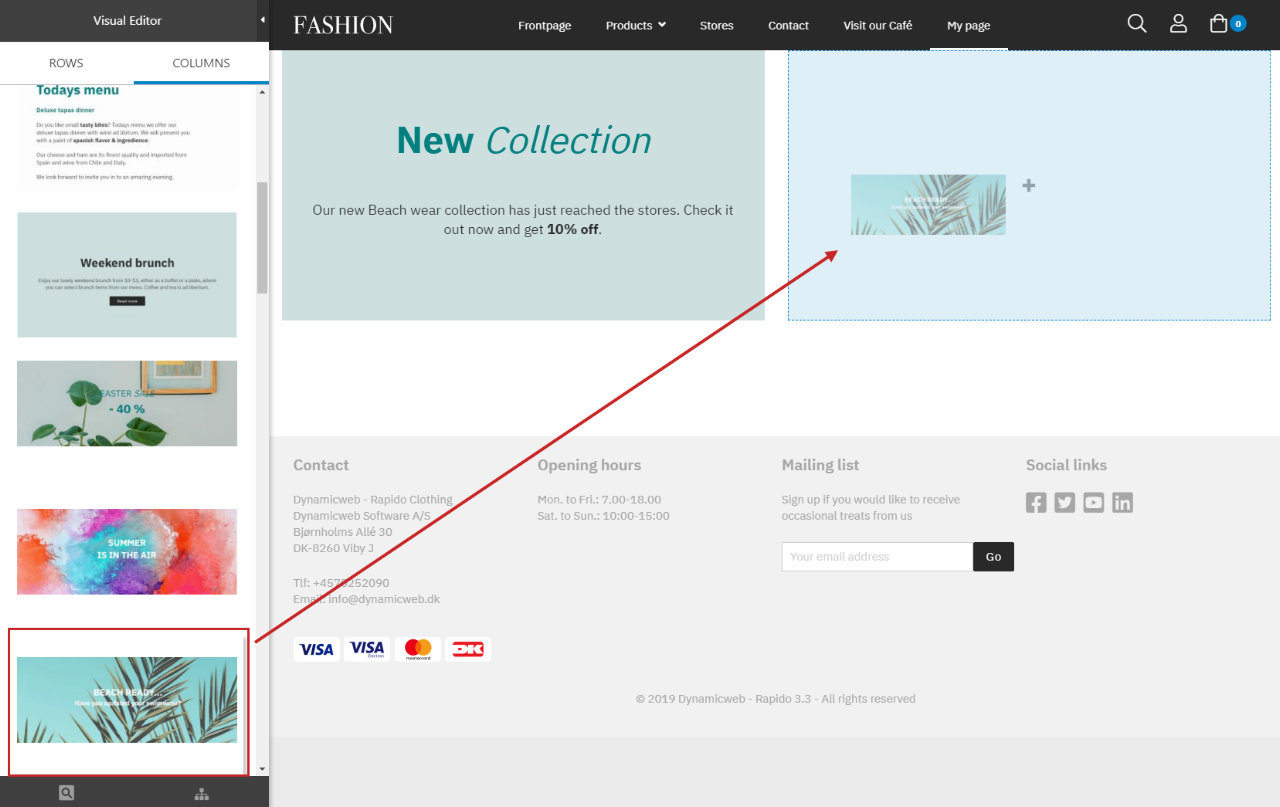
Step 12: Content
Create content pages in the Content area and use the Rapido Content model with Visual Editor to add and configure paragraph content fast and easily.
For Rapido 3.2 and below users: You can create much of the same content by using the different paragraph item types (Paragraph container, Simple paragraph, Overlay, Video, etc.) or apps (Item Publisher, Forms for Editors, etc.).
See the Rapido documentation for the different configuration options.