
Banners
This item is only compatible with Rapido 3.2 or earlier versions.
You can use the Rapido Content Model to create similar types of content.
Website design changes frequently - what was popular a year ago, might not be popular today or tomorrow.
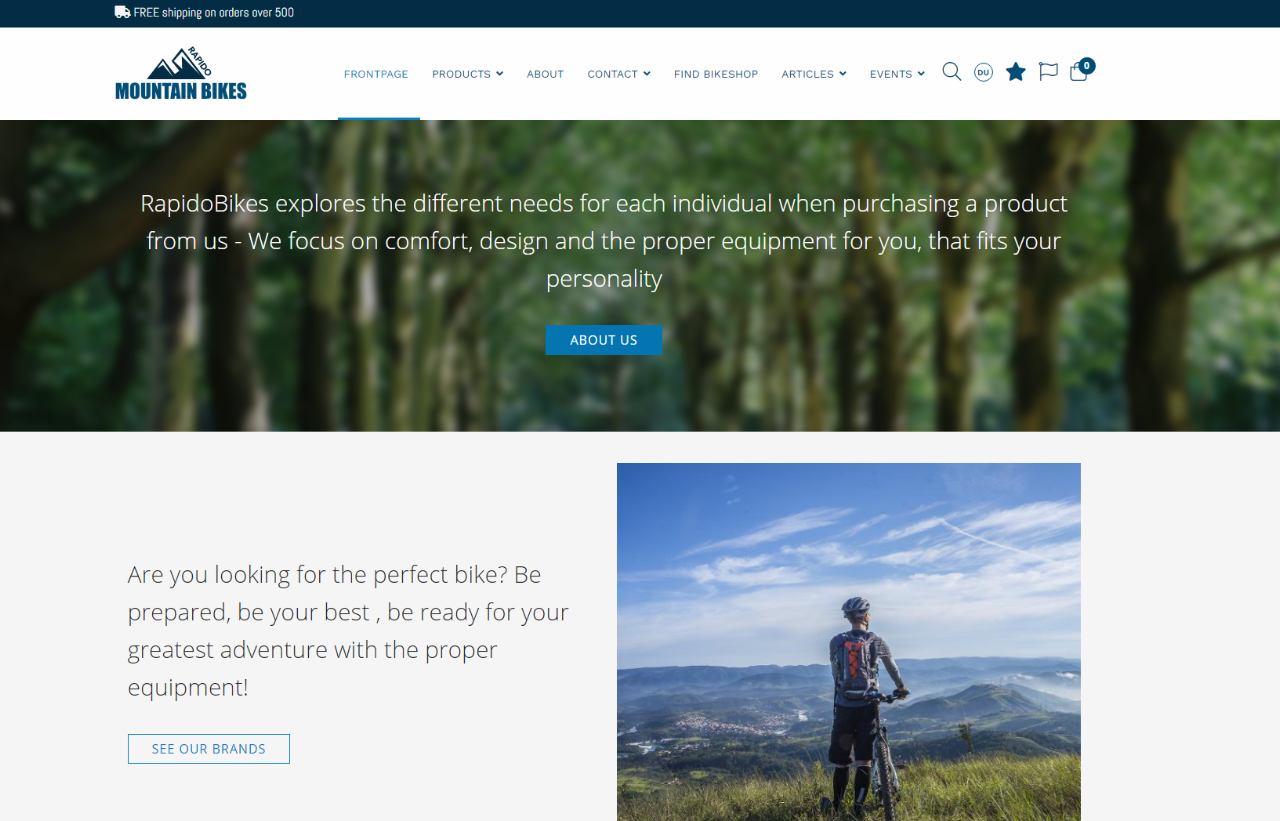
Right now, a lot of websites feature a large banner at the top of the page (Figure 2.1).
This article will guide you through creating a banner with Rapido.
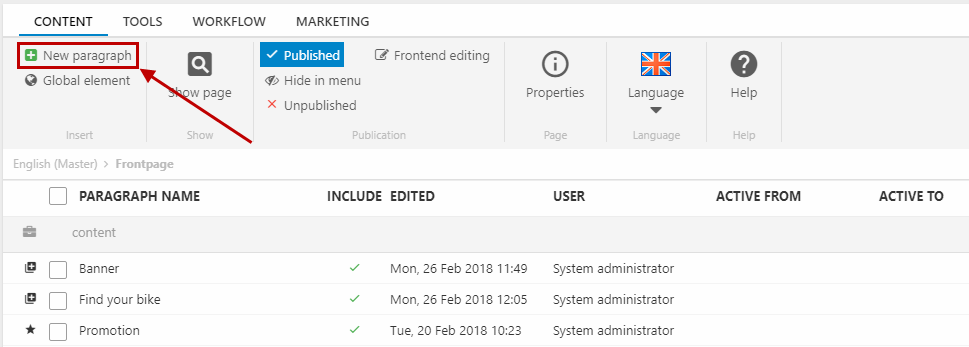
To create a banner, you must create a new paragraph (Figure 2.2).
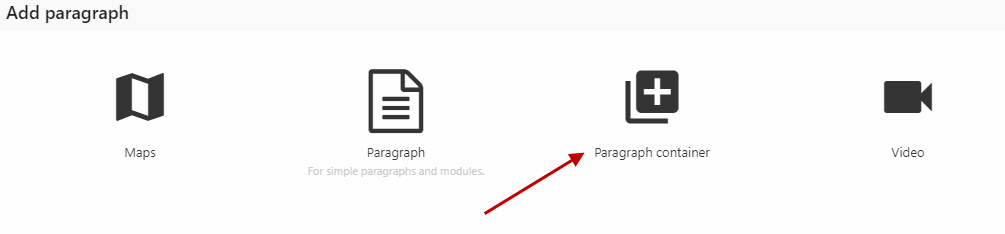
And choose the paragraph container item type (Figure 2.3).
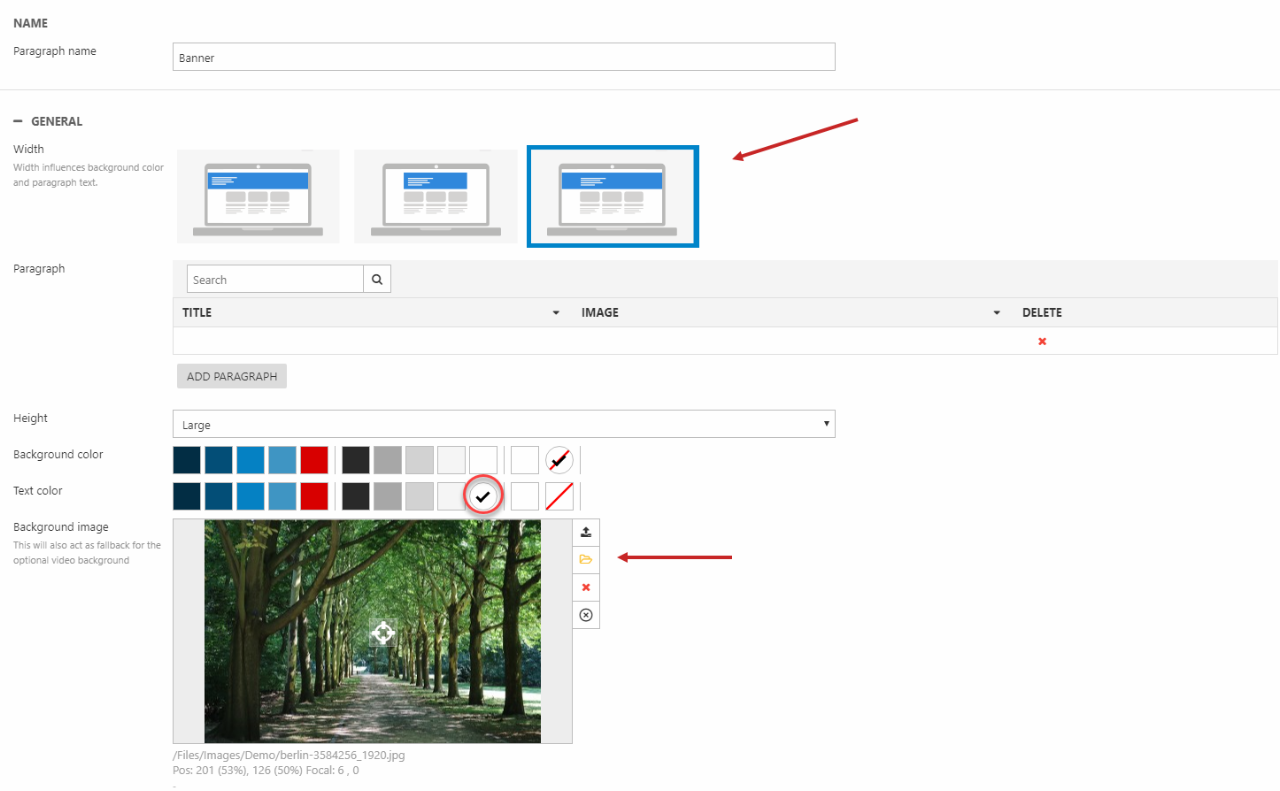
Then, you must:
- Set the preferred width using the width settings (Figure 3.1)
- Select the banner as the background image
- Select the height of the banner
- Select an appropriate color for the font
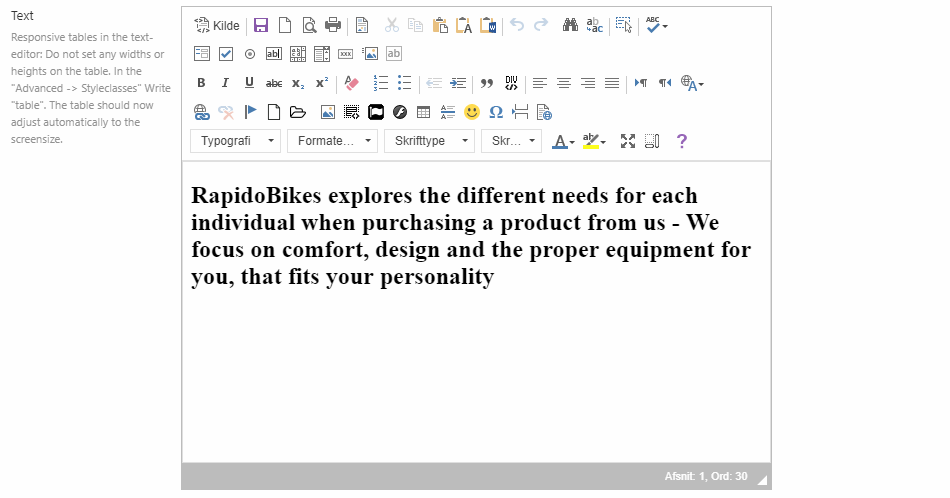
To add text to the banner:
- Click Add paragraph
- Under General, leave the title blank but add some text, then SIZE IT APPROPRIATELY TO THE BANNER
- After the text is made, scroll down to the link settings
- Choose your heading style in the rich text editor (h1, h2, h3, normal)
After configuring the the text of the paragraph, it's time to add a button to the banner:
- First, choose which page the button should link to by using the file uploader
- Then, pick an appropiate text for the button
- Lastly, choose the design for your button e.g. primary

Layout
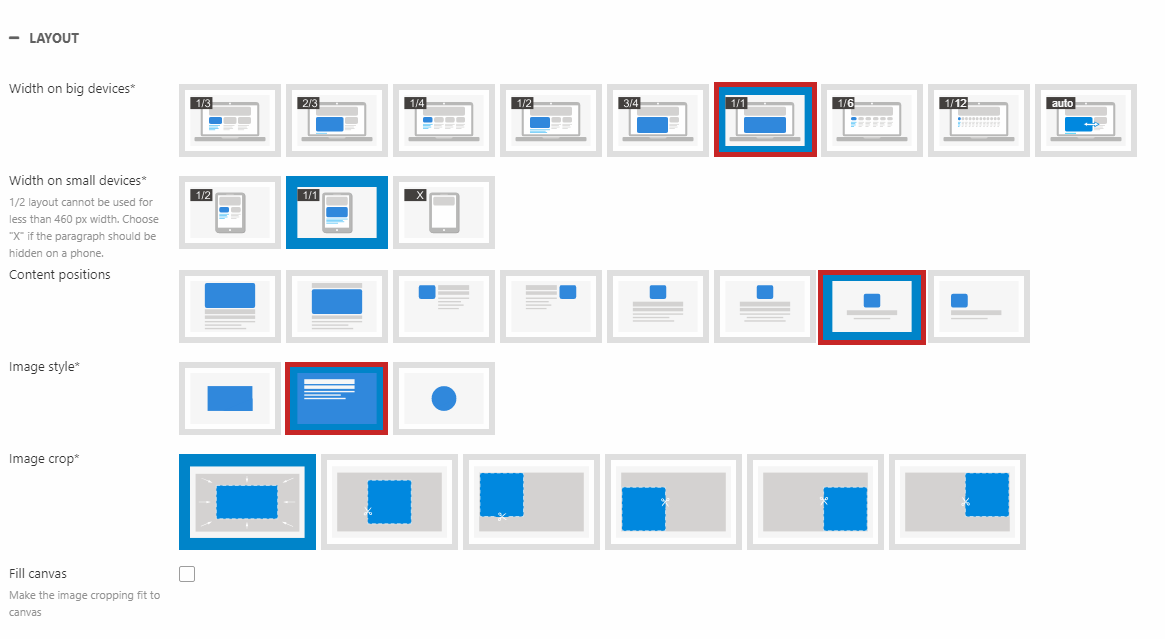
Now that you have made the paragraph and the button for your banner, it is time to configure the layout, follow the steps listed below:
- For the setting width on big devices, choose 1/1
- Secondly, pick the centered layout for content position, as shown on (Figure 4.1)
- At the image style settings, pick the second option as shown on (Figure 4.1)
- Lastly choose the first option from the image crop settings
- Remember to save your paragraph settings
Now the layout is done and defined, the next step is configuring the image used in the banner, by adding some filter to it. Make sure the text on the banner is clear and easy to read when modifying these settings. The steps below will guide you through:
- Scroll down to the image filters section and open it
- Choose darken as the primary background filter
- Then, choose blur as the secondary background filter
