
Upgrading Dynamicweb
A standard Dynamicweb solution can be upgraded in two ways:
- Through the administration interface
- By accessing the server and switching to a newer application
Custom solutions are a little more complicated to upgrade, as you need to handle custom dlls and any customized web.config content manually.
Note: After upgrading a solution always clear your browser cache - if you don't, you may encounter all kinds of confusing issues.
Upgrading from the administration interface
To upgrade a solution through the administration interface, simply navigate to Settings > Web and HTTP > Manage versions (Figure 2.1).
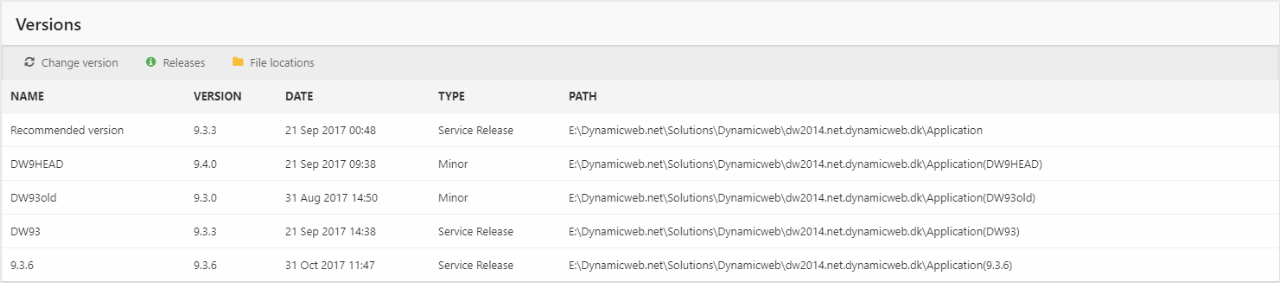
You will see a list of available versions, along with some related information – release dates, type, etc.
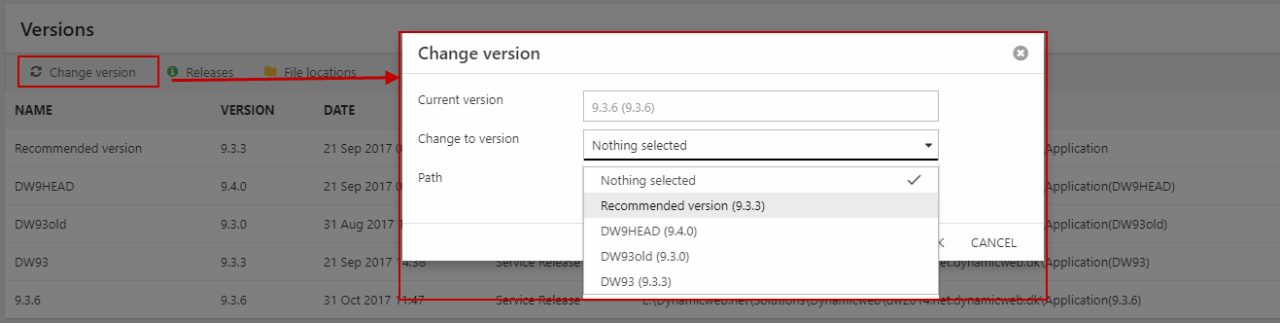
- Click Change Version in the toolbar to open the change version menu.
- Select the desired version (Figure 2.2)
- Click OK.
The solution will be updated – as a part of this process the application pool will be recycled and you will be logged out.
Upgrading via the server
If you have access to the hosting environment, or if you are running a local solution, you can also upgrade via the IIS Manager.
To upgrade a solution via the server:
- Download the new solution from the Downloads area and unzip it – we recommend you place it in a dedicated Applications folder like we do in the install guide.
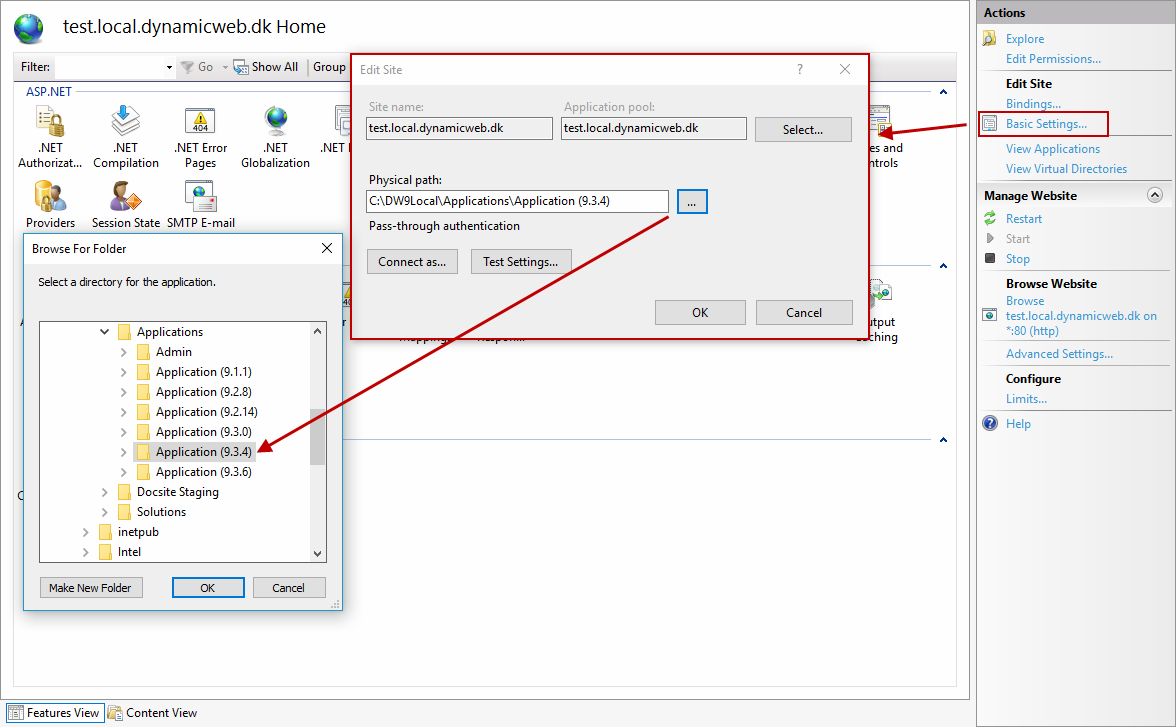
- Open the IIS Manager
- Open Website > Basic Settings and switch to the newly downloaded application (Figure 3.1)
Please note that this assumes you have created a virtual directory pointing to a /files folder in a Solutions folder – if not, you must also move the solution files folder to the new application folder.
Upgrading a custom solution
When upgrading a custom solution, there are two approaches:
- You can switch to a new application and copy all custom dll’s to the new application bin folder. Your /files folder should already be a virtual directory, but if it’s not it should also be moved. You may have to overwrite or merge the web.config file of the new application with your existing web.config
- You can copy the /bin and /admin folders of the new application to the existing solution folder. You must also move the web.config file – or merge it, if the existing web.config contains custom code.
Please note, that if you are upgrading from DW8 to DW9 all custom code must be recompiled for DW9. You must also remove Dynamicweb.TemporaryServices.dll and Dynamicweb.TemporaryServices from the solution /bin folder.
If your custom solution is package-based you can also upgrade via the package manager interface – be advised that this is a fairly time-consuming process, and that you may encounter some timeout issues if your internet connection is unstable.