
Permissions
Permissions exist to give you total control over what content and which apps can be viewed or used by which users and user groups.
As such, permissions are crucial for creating restricted areas and content, beyond the basic control you have with user type settings.
The most important thing to realize about permissions in Dynamicweb is this:
- Permissions in Dynamicweb are always set on the restricted content or app and never on the user
If, for instance, you want to prevent a certain user from accessing a specific page, you cannot do this by changing permissions in the properties of the user. Instead, you have to change the permissions in the properties of the page itself.
What are permissions
A permission in Dynamicweb is a simple statement which either allows or denies a user access to perform an action on an element.
Permissions can be explicit or inherited.
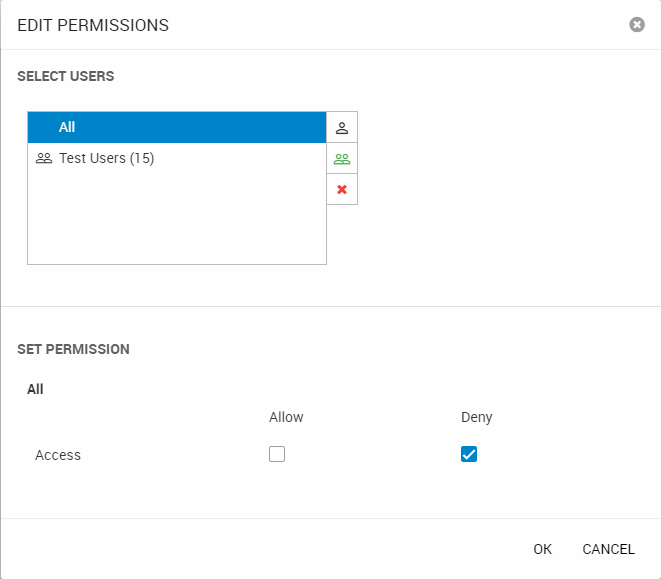
Consider Figure 2.1, where permissions for a paragraph are being set, on the group all.
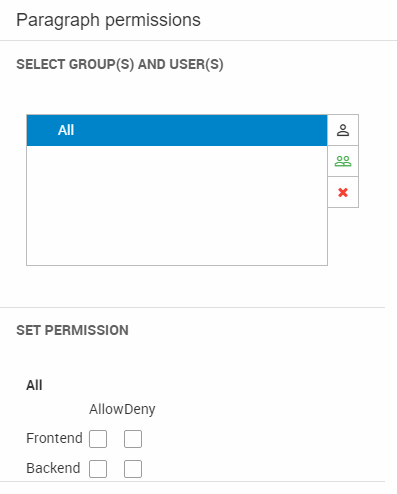
As you can see, you can Allow or deny frontend and backend access to the paragraph, for users in the all group, by checking the appropriate checkboxes.
Permissions are always inherited from their parent group – if no parent groups exist, or if no permissions are set on the parent group, the permission defaults to allow.
Permissions - an example
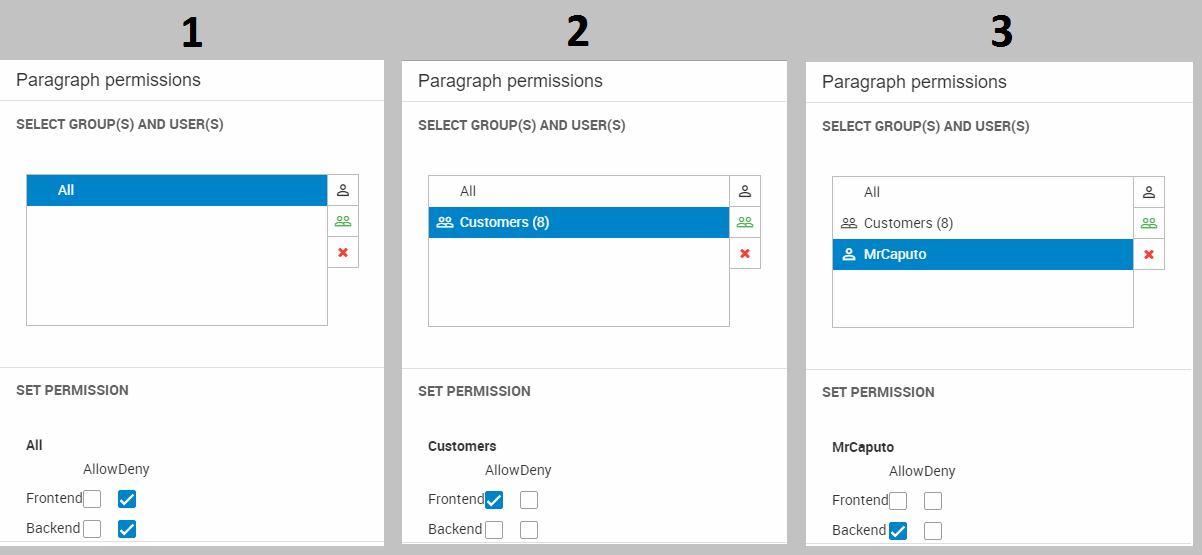
You want a certain user group to have access to a paragraph on the frontend, but you want to have only one of the group members have access to the group from the backend. Which permissions should you set?
Here’s a step by step guide to that:
- First, consider the group All (which contains all your users). These should be denied access, because you want to deny everyone except a specific group access to the paragraph.
- Second, add the group you want to allow access to the permissions list. Select the group and check the Frontend > allow checkbox. You don’t need to deny access to the backend – this setting has been inherited from the All group.
- Third, add the user you want to give full access to. Select the user, and check the backend > allow checkbox – you don’t need to check the frontend > allow checkbox, since that setting has been inherited from your group (of which the user is a member)
Conflicting permissions
In cases where users are members of more than one group it is possible to inherit seemingly conflicting permission settings where the same action is allowed for one parent group and denied for another.
In such cases, an Allow inherited from one group overrides a Deny inherited from another group - except if the Deny is set on the specific user.
If you encounter these problems, however, consider reworking your group structure.
Page permissions
To set permissions on a page:
- Open the page properties
- Go to the Advanced tab and click Permissions (Figure 4.1)
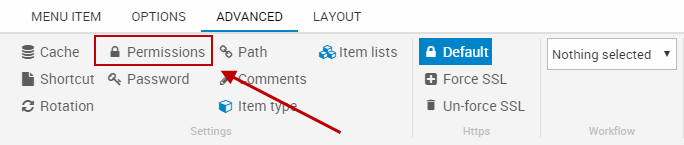
This opens the page permissions interface (Figure 4.2).

From here, you can setup permissions for the page.
(The frontend section is only available on solutions with the Extranet app).
You can setup permissions for all pages on a website if you go to Apps - Websites and edit your website. In the websites ribbon you also have a Permissions button that gives you the same Permissions window as in Page properties.
Restoring pages with permission
If you use the recycle bin to restore a deleted page, only permissions that have been explicitly set on the page are kept as they were. In contrast, when restoring a deleted page with inherited permissions it will inherit whatever permissions its new parent has.
Paragraph permissions
To set permissions on a paragraph:
- Go to the paragraph in question and click the Advanced tab
- Click the Permissions button (Figure 6.1)

This opens the paragraph permissions interface(Figure 6.2).
From here, you can setup permissions for the paragraph.
App permissions
With app permissions, you can control which user and user groups have access to an app from the backend, including the ability to access, edit, create and delete instances of the app in question.
To set permissions on an app:
- Go to the Apps area
- Right-click on the app in question and click Permissions (Figure 7.1)
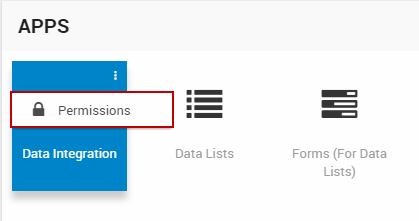
This opens the app permissions window (Figure 7.2)
From here, you can setup permissions for the app.
Ecommerce permissions
Permissions can also be used to control which backend users or user groups have access to the various Ecommerce tools.
Simply right-click a node in the Ecommerce tree and open the permissions interface (Figure 8.1).

Ecommerce permissions apply only to backend users and may be set for:
- Shops
- Orders and recurring orders
- Quotes
- RMA
- Statistics
- Discounts and Loyalty Points
- Vouchers & Gift Cards
This means that you can heavily minimize the risk of human errors by setting the appropriate permissions.
Files permissions
Permissions can also be set in the file manager, by right clicking a folder in the files tree (Figure 9.1) and clicking permissions.
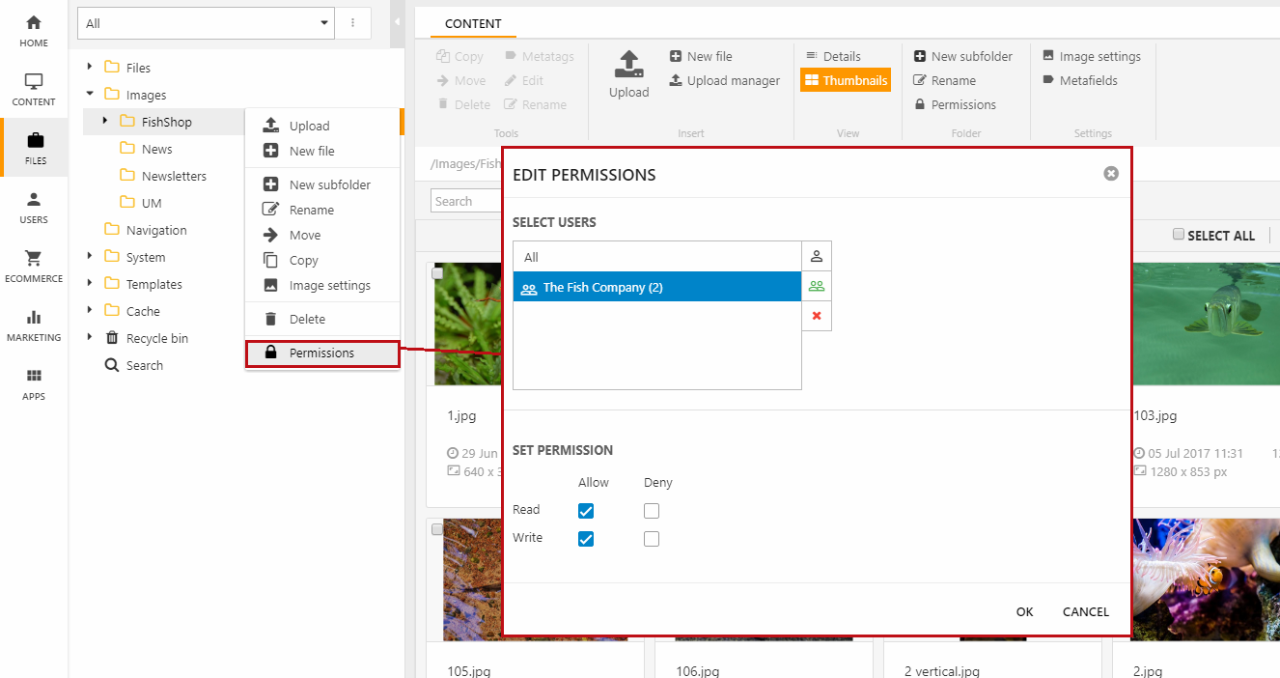
Permissions can currently be set on folders only - people with direct links to files can still access them.
To shut down a folder so that no one can browse the contents, place a web.config file in the folder with the following content:
This blocks all users from accessing the folder contents using direct urls.

Database
User permissions are handled in the standard AccessUser table - see more here - but permissions for the Ecommerce backend are handled in the following tables:
EcomUserPermission
Keeps track of access permission for users and groups (UserPermissionUserId) in Ecommerce (UserPermissionTypeGUID).
| Field name | Data type | Length | |
|---|---|---|---|
| UserPermissionTypeGUID | uniqueidentifier | 16 | |
| UserPermissionUserId | int | 4 | |
| UserPermissionRights | int | 4 | |
| UserPermissionAutoId | int | 4 |
EcomUserPermissionType
Links permission collections (UserPermissionTypeGUID) to Ecommerce objects (UserPermissionTypeId).
| Field name | Data type | Length | |
|---|---|---|---|
| UserPermissionType | nvarchar | 50 | |
| UserPermissionTypeId | nvarchar | 255 | |
| UserPermissionTypeGUID | uniqueidentifier | 16 | |
| UserPermissionTypeAutoId | int | 4 |