
Drafts & Workflows
More often than not, managing a Dynamicweb solution involves more than one person.
This means that more than one person probably has an opinion or a say in content creation and management.
To facilitate working with content in teams, Dynamicweb ships with a number of helpful tools, such as:
- The Drafts tool
- The Workflows tool – including the version control workflow
Here’s what they do, and how to use them!
Drafts
The Drafts tool lets you track changes to pages, then compare them, before either approving or discarding the changes.
To use the drafts tool:
- Go to the page view in your Dynamicweb backend
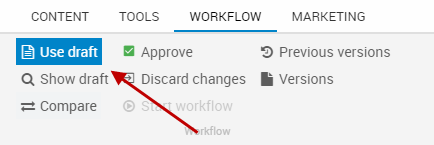
- Navigate to the Workflow tab and click the use draft button in the ribbon bar (Figure 2.1)
- Start editing the page content, i.e. adding or editing paragraphs
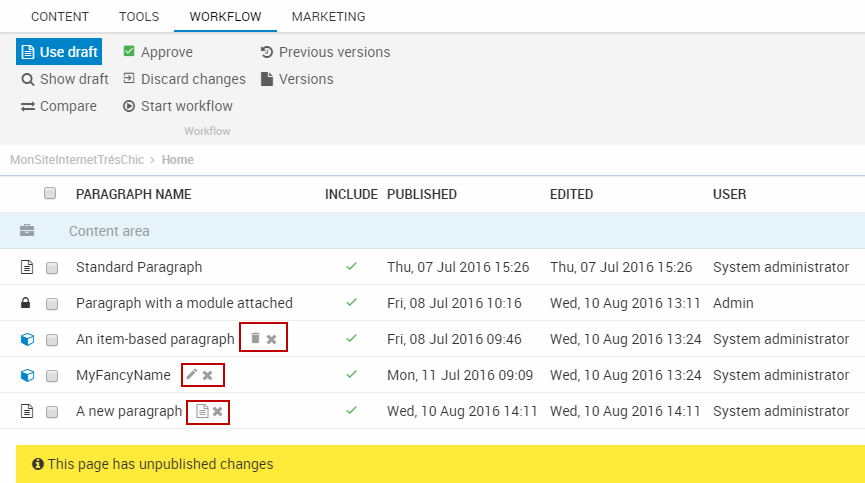
A paragraph list containing edited (but not published) content will contain a notification, and the edited paragraph will show up with adornment icons (Figure 2.2):
The adornments related to drafts and workflows are:
|
Icon |
Meaning |
|
|
Unpublished – all modified paragraphs will have this adornment until the draft has been approved |
|
|
New content |
|
|
Edited content |
|
|
Deleted content |
Once content has been created or edited and then saved, you have access to the rest of the draft-related buttons. You can:
- Click Show draft to view the draft in frontend
- Click Compare to view a side-by-side comparison of the existing and draft versions of the page
- Click Approve to approve (and publish) the changes
- Click Discard changes to, well, discard the changes
Workflows
The Workflows tool enables you to create and assign roles to individual users, and to create rules in order to control workflows and procedures. This enables you to control "who does what" on your website, facilitating consistency and uniformity across the entire website.
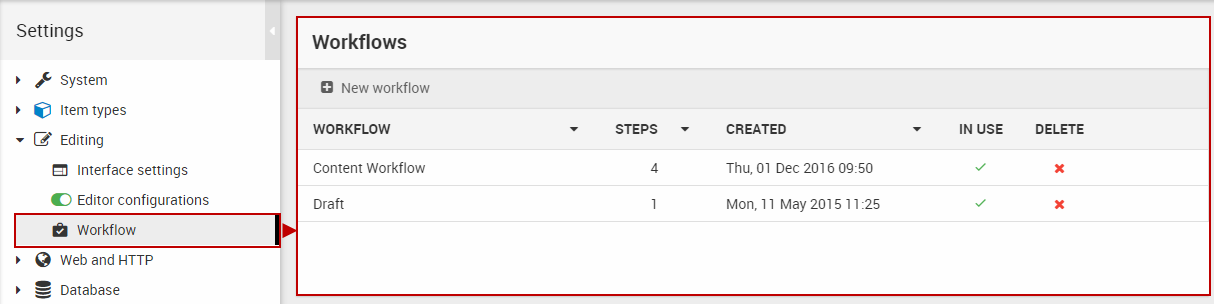
Workflows are created and managed from the workflows overview (Figure 4.1) - Settings > Editing > Workflow.
Once created, a workflow can then be applied at a website or page level.
Creating a workflow
To create a workflow, click New workflow in to toolbar to open the new workflow dialogue (Figure 5.1).
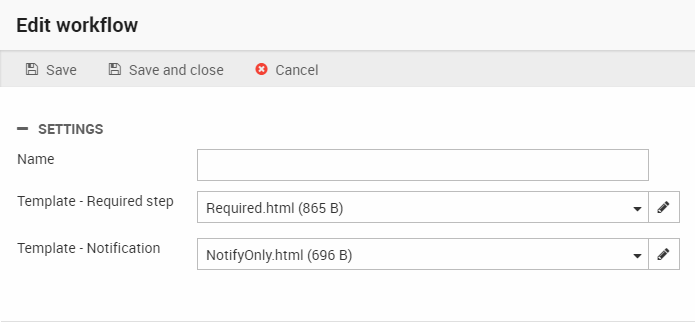
Name the workflow, and select and/or customize the templates used to general approval required and notification emails.
Save and close the workflow to go to the participants-view, from which you add and assign users and roles to the workflow.
Workflow steps/participants
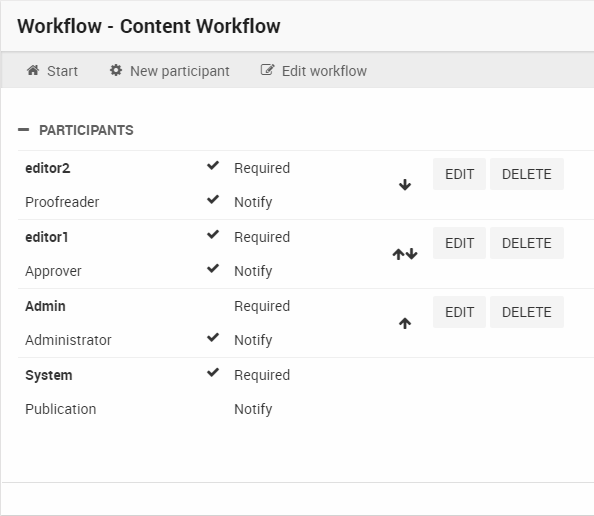
From the participants view (Figure 6.1), you can create and manage the steps in the workflow – each participant representing a step.
The workflow starts with the topmost participant on the list, either notifying or pausing for approval (or both), before moving on the next participant on the list.
To add a step/participant to a workflow, click New participant in the toolbar to open the create participant view (Figure 6.2).
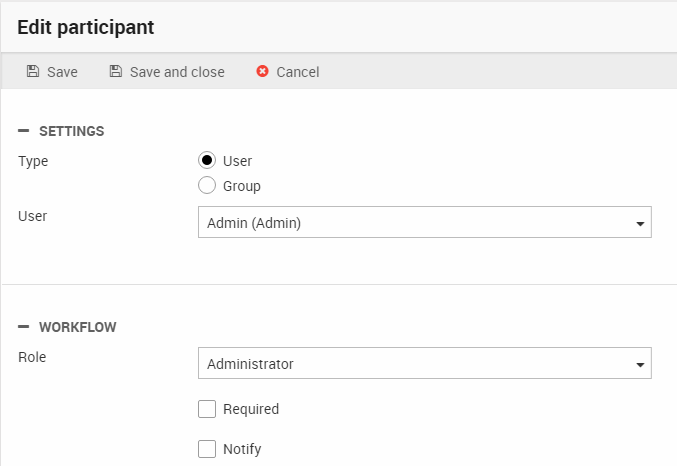
From the create participant view, you must:
- Select a particular user or user group (such as ‘editors’ or ‘proofreaders’)
- Select a role for the user or user group – Administrator, Approver, Hearing party or Proofreader. The roles have no function beyond categorization.
- Specify whether this participant need to approve the changes – if so, check the required checkbox – or need merely be notified of changes.
- Save the participant
Applying a workflow
Workflows can be applied to both entire websites and to specific pages.
To apply a workflow to a website:
- Open the website settings
- Navigate to the workflow tab and select a workflow using the dropdown
- Save or Save and Close the website settings
To apply a workflow to a page:
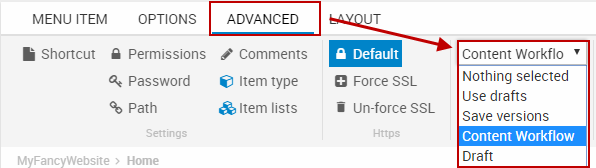
- Go to the page properties
- On the advanced tab (Figure 7.2), select your workflow in the workflow dropdown
- Save or Save and Close the page properties
Using a workflow
When a page has a workflow associated with it, changes to content are not published immediately.
- Changed paragraphs are marked with adornments as in Figure 8.1.
- Review the proposed changes by clicking show draft or compare in the toolbar, to see either the draft alone or the draft and original side-by-side.
- Start the workflow by clicking the Start workflow button in the toolbar.
This will notify the first person (or group) on the list of participants (if set to notify) and/or pause the workflow pending approval, depending on your setup.
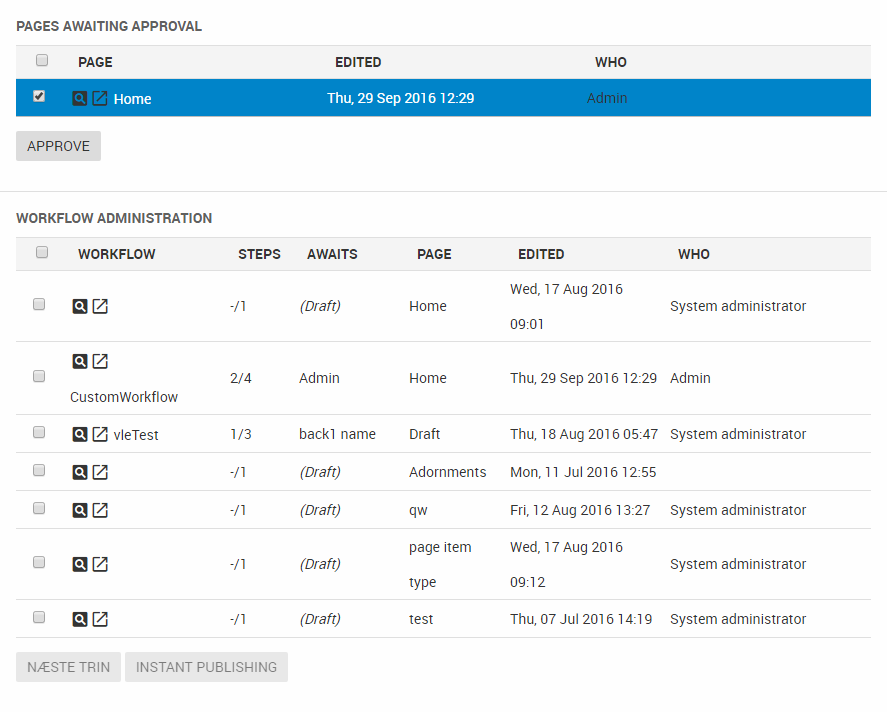
Participants may access their workflow tasks using the context menu for a website (Figure 8.2).
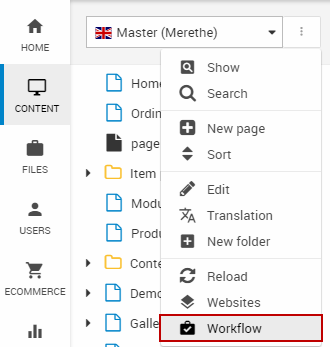
This will open a workflow window (Figure 8.3) with a list of pages with changes pending approval, and from which you can:
- Use the buttons on the left side of the screen to view the old and new versions
- Approve the changes which are deemed acceptable.
With administrator access, you can:
- See the step the workflow is on, and whose approval is pending
- Force the workflow to proceed to the next step
- Override the entire workflow and instant publish a page
Version control
Dynamicweb ships with a particular kind of workflow which allows you to work with version control on both a page and paragraph level.
With version control, you can:
- View and compare earlier versions of a page with the current one
- View, compare and restore paragraphs to an earlier version than the current one
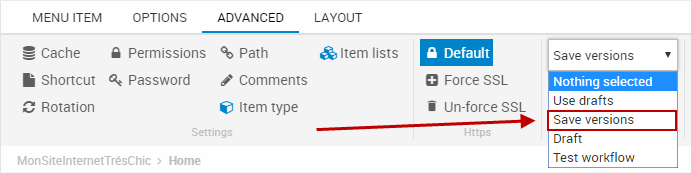
To enable version control, go to the website or page properties and select the Save versions workflow (Figure 9.1).
This enables version control on your page or website.
Version control for pages
Once enabled, you can explore earlier versions of a page by going to the paragraph list of a page and using the Previous versions and Versions buttons (Figure 10.1).
The Previous versions button opens a date selector – simply select a time and date to view the version from that point in time (if it exists).
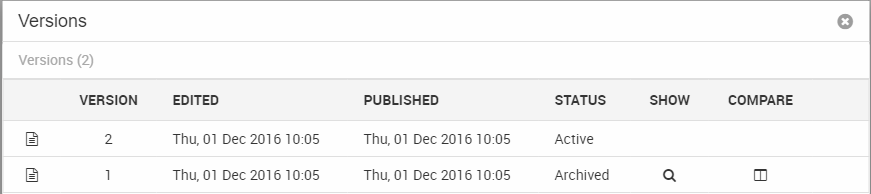
The Versions button opens a list of archived versions (Figure 10.2). From this list, you can:
- View the total number of archived versions (here 2, max is 200)
- See when the page was last modified and published
- View an archived version, and compare it to the current version
Version control for paragraphs
To work with version control for paragraphs, go to the paragraph edit view and switch to the Advanced tab (Figure 11.1).
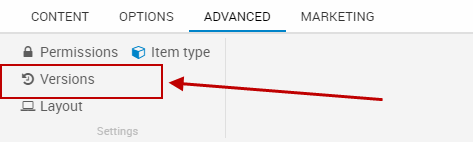
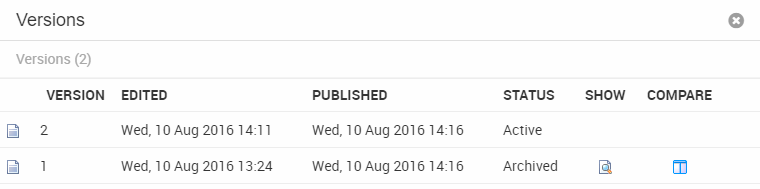
Click the Versions button to open a list of archived versions (Figure 11.2).
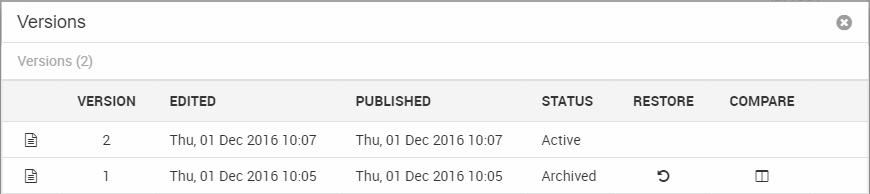
From the versions list, you can:
- View the total number of archived versions (here 2, max is 200)
- See when the paragraph was last modified and published
- Compare the current paragraph to an older version
- Restore the paragraph to an older version

AccessWorkflow
Contains definitions of workflows from the workflow app.
| Field name | Data type | Length | |
|---|---|---|---|
| AccessWorkflowId | int | 4 | |
| AccessWorkflowTitle | nvarchar | 255 | |
| AccessWorkflowCreatedDate | datetime | 8 | |
| AccessWorkflowNotifyTemplate | nvarchar | 255 | |
| AccessWorkflowRequiredTemplate | nvarchar | 255 |
AccessWorkflowUser
Connects workflows and participants via AccessUserId.
| Field name | Data type | Length | |
|---|---|---|---|
| AccessWorkflowUserId | int | 4 | |
| AccessWorkflowUserUserId | int | 4 | |
| AccessWorkflowUserWorkflowId | int | 4 | |
| AccessWorkflowUserRole | int | 4 | |
| AccessWorkflowUserPriority | int | 4 | |
| AccessWorkflowUserNotify | bit | 1 | |
| AccessWorkflowUserRequired | bit | 1 |
VersionData
Contains versioning data for pages, paragraphs and ecommerce objects (VersionDataType) in the form of an XML document (VersionDataXML).
| Field name | Data type | Length | |
|---|---|---|---|
| VersionDataId | int | 4 | |
| VersionDataType | nvarchar | 255 | |
| VersionDataTypeId | int | 4 | |
| VersionDataCreated | datetime | 8 | |
| VersionDataEdit | datetime | 8 | |
| VersionDataPublishedTime | datetime | 8 | |
| VersionDataPublished | bit | 1 | |
| VersionDataXML | nvarchar | Max | |
| VersionDataTypeIdString | nvarchar | 255 |