
Languages, Countries & Currencies
It is one of the great paradoxes of the modern world, that while business and commerce is increasingly global, most customers are still local, and expect (to various degrees) to be served in their local language and currency.
And so, ironically, internationalization often means localization – conforming to local standards.
In Dynamicweb, languages and localization is handled separately for the content and Ecommerce – to learn about translations and localization of content, please see the Websites & Language Layers. The current article covers internationalization of Dynamicweb Ecommerce.
When working with Dynamicweb Ecommerce you have access to several types of tools for internationalization:
- You can create Ecommerce languages, which allow you to localize context based fields e.g. product names, custom product fields, and so forth, and of course control which products should be available in which language contexts
- You can create countries, and manage attributes related to them, e.g. country codes and default VAT and currency codes, and add regions to them if necessary.
- You can create currencies related to the countries in which you do business, including exchange rates and currency-specific rounding methods
- Finally, internationalization must also touch upon the wonderful world of sales taxes and VAT, locally and across borders – those topics are described in a dedicated article.
Read more below!
When you’ve created the languages, countries and currencies necessary for your setup, make sure you set a default country, language and currency on each website or language layer. Not doing so is one of the most common sources of WTFs in Dynamicweb.
Basic Concepts
In this section, you will learn about:
- Ecommerce languages, and how to create them on your solution
- Delivery countries, and how to add new countries to your solution
- Currencies, and how to create currency-specific rounding methods
Languages
Just like website content is localized by adding language layers to a website and then making changes to the language layer, your Ecommerce can be localized by adding a new Ecommerce language to your solution, and changing the localized content.
You can then select the language as the default language on the Ecommerce settings of a website. You should decide on your default language early on in your design process – changing the default language is not trivial, as it forces a localization of products and product groups to the new default languages, and may have other unintended consequences.
Adding a new Ecommerce language to your solution allows you to localize:
- Products & product groups
- Currency names and country names
- Stock states, stock locations & product unit names
- Order discount & sales discount labels
- Loyalty point rewards labels
- Variant group names
- Relation group names
- Product field names & product group field names
- Product category & product category field names
- VAT group names
To add a new language to your solution:
- Go to Management Center > Ecommerce > Internationalization > Language
- Click New Language in the toolbar to open the edit language view (Figure 3.1)
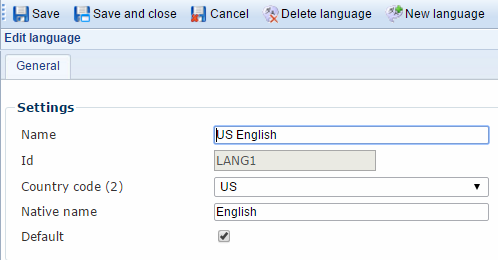
From here, you must:
- Name the language, and select the matching country code
- Provide a native name for the language – this name will be used when switching between language contexts
- Check the default checkbox if this is your default Ecommerce language. Please note that changing the default language will force-localize all non-localized product to the new default language.
Switching language context
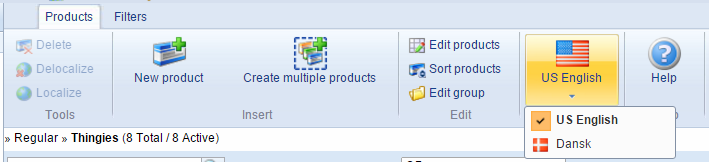
Once more than one Ecommerce language has been created, you can switch between language contexts in Dynamicweb Ecommerce by clicking the little flag icon in the ribbon bar of e.g. a product list (Figure 4.1)
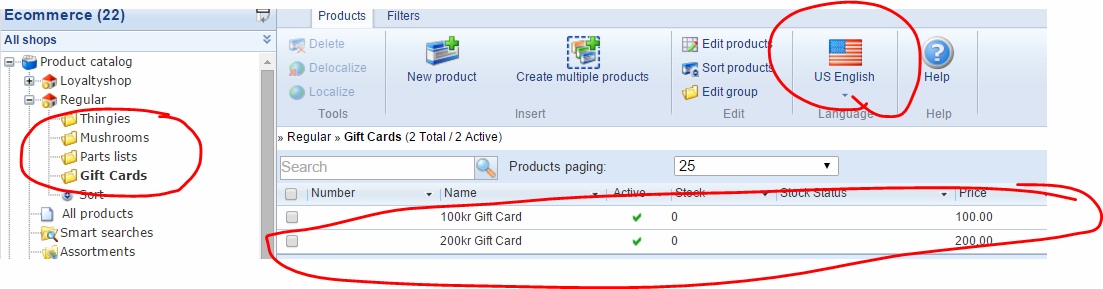
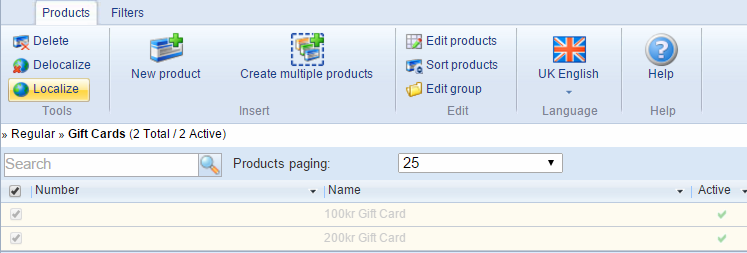
For example, your default language is US English and you have a product group called Gift Cards with two products in it (Figure 4.2). You then switch the language context.
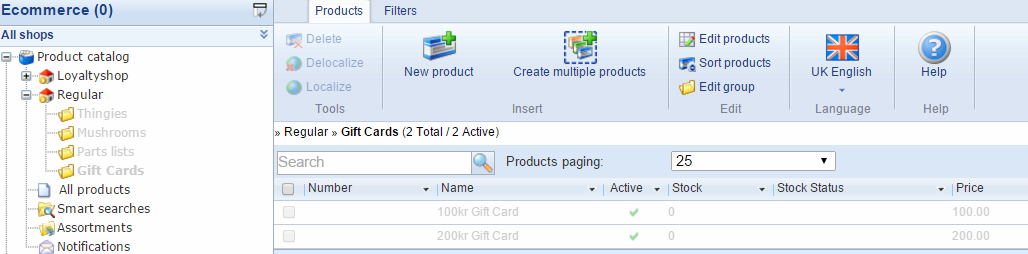
Once the language context has been switched to Danish, any products and product groups existing in your default language (Figure 4.3) will now appear greyed out – this is because they are not localized yet.
Content tied to only one language context
Some Ecommerce features are created in a particular language context – and exist only there. This is true for:
- Payment methods and shipping methods
- Address validation methods & validation groups
All of these are language-specific and cannot be localized, but must be created separately in each language context.
Localizing Ecommerce content
Localizing Ecommerce content is a matter of:
- Switching the language context to the desired language
- Selecting the content you want to localize
- Localizing and saving the content
For instance, to localize products simply select them from a product list and click localize in the ribbon bar (Figure 6.1).
This will localize the selected products to the current language context – and the product group to which the products belong. You can also localize a product from the product details view by changing the language context and saving the product.
Similarly, to localize a product group:
- Switch to the desired language context
- Right-click the product group in the Ecommerce tree
- Click Edit group and make any changes (e.g. changing the name) necessary
- Save the group.
This localizes the product group, but not the products in it – they must be localized separately.
After localizing a part of your Ecommerce system, don’t forget to actually change the field content – names, prices, and so forth.
You can localize the following content:
- Products & product groups
- Currency names and country names
- Stock states, stock locations & product unit names
- Order discount & sales discount labels
- Loyalty point rewards labels
- Variant group names
- Relation group names
- Product field names & product group field names
- Product category & product category field names
- VAT group names
Force-show unlocalized product catalog content
By default, unlocalized product catalog content – products, product groups and related products – is not shown in the frontend, but you can change that by going to Settings > Ecommerce > Advanced configuration > General and unchecking the Only show translated elements checkbox (Figure 6.3).

Creating new products in language contexts
If you create a new product in the default language, it is unlocalized in all non-default languages.
If you create a new product in a non-default language, it will be unlocalized in all your other languages – including the default language.
If you localize it to the default language, you cannot delocalize it from the default language again – rather, you must deactivate it instead. Make sure you allow differentiated field values for the active-state across languages – read more below.
If you want to, you can force newly created products to be localized on creation to all you languages. To do so:
- Go to Management Center > Ecommerce > Advanced configuration > General
- Locate the Language section (Figure 7.1) and check the Activate products on all language versions on create checkbox.

Controlling variation across languages
When working with products across multiple languages, you may need to allow or disallow the localization of certain product fields.
For instance, you probably want to allow the name of a product to be different from one language to another, but the product number probably shouldn’t be different.
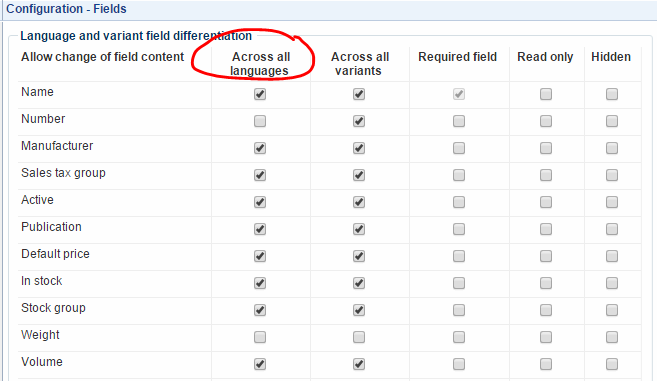
To control variation across languages,
- Go to Management Center > Ecommerce > Advanced configuration> Fields
- Check the appropriate checkbox in the across all languages column (Figure 8.1).
Countries
For each country you do business with, you must create a corresponding country on your solution.
You can then select the country as the default country on the Ecommerce settings of a website.
Countries in Dynamicweb Ecommerce are used to:
- Control which countries and regions can be selected as billing and delivery countries
- Anchor shipping methods and payment methods to a particular country – and preselecting default shipping and billing methods
- Setting the system VAT rate
To add a new country to your solution:
- Go to Management Center > Ecommerce > Internationalization > Countries
- Click New Country in the toolbar to open the country selector and add a country (Figure 9.1)
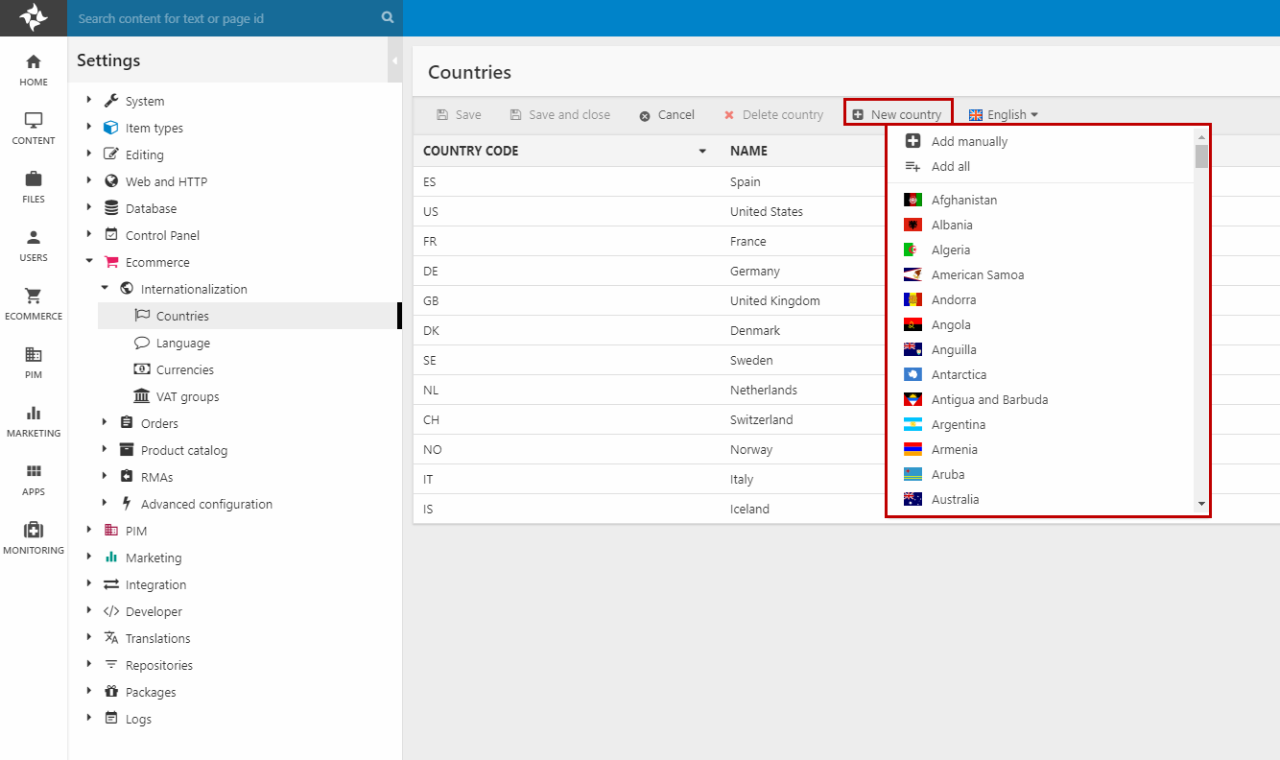
A new country is created with the basic information already filled out, except the system VAT rate.
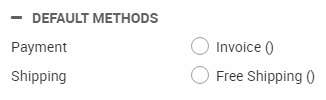
Click the Default methods tab (Figure 9.2) to select a default payment method and shipping method for the country.
They will be preselected in the shopping cart when the user checks out in the relevant country-context.
If none are available for selection, you need to create them and select them for the country (or All Countries). Switch between language contexts to access the methods created under a non-default language.
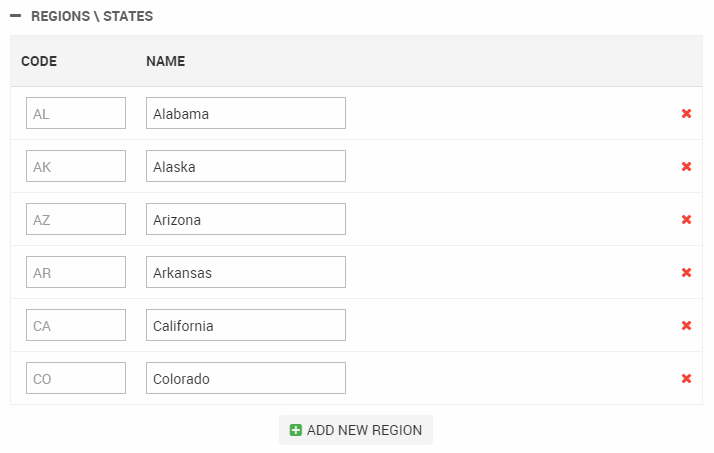
From the Region/States-tab (Figure 9.3), you can add regions/states to the country.
This allows your users to select states and regions, in addition to the country, when specifying their delivery and billing addresses during checkout – and is also used for e.g. address validation services and the Avalara AvaTax provider when calculating taxes.
Currencies
Currencies in Dynamicweb allow you to create and manage currencies related to the countries or economic zones in which you do business.
You can then select the currency as the default currency on the Ecommerce settings of a website.
To create a new currency:
- Go to Setting > Ecommerce > Internationalization > Currency
- Click New Currency in the toolbar to open the Edit currency view (Figure 10.1)
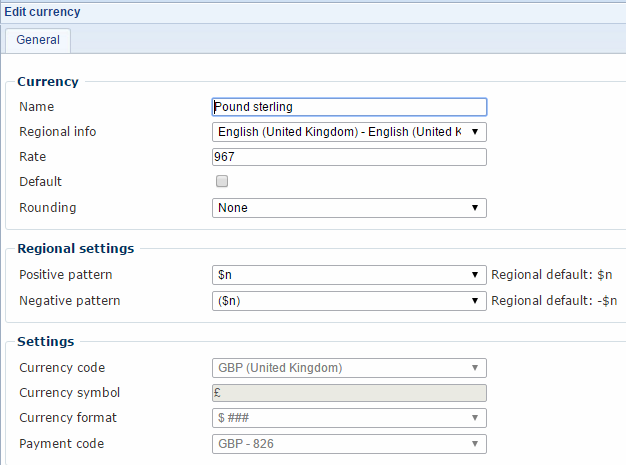
From edit currency view, you can:
- Name the currency (the name can be localized to fit each of your languages)
- Select a region in the regional info dropdown – if a region is selected here, the Settings section will be auto-filled by the system and will not be editable.
- Set an exchange rate for the currency (in relation to your default currency)
- Check the Default checkbox if you want this currency to be your default, or base, currency.
- Select a rounding method for prices in the selected currency – if none are available, you must create them. Read more below.
If you selected a region from the regional settings dropdown, you have access to the regional settings. With these you can customize how positive and negative amounts are rendered – or use the default pattern.
If you don’t use the region dropdown you have access to the Settings fields, where you can select a currency code, currency symbol, currency format and a payment code manually.
On Exchange rates
To get correct exchange rates, you must define non-default currencies in relation to the default currency in the following manner:
- USD: 100
- EUR: 125
- DKK: 665
In other words, the rate should be the number of default currency units required to get the default currency amount (100) in the non-default currency.
Rounding
Prices in Dynamicweb are subject to changes – from changing exchange rates, taxes, VAT rates and so forth.
To combat weird prices, and to conform to currency-specific pricing practices (such as .99-prices), you can set up rounding methods and apply them to a currency.
To create a rounding method:
- Go to Management Center > Ecommerce > Advanced configuration > Rounding
- Click New rounding in the toolbar to open the rounding method definitions (Figure 11.1)
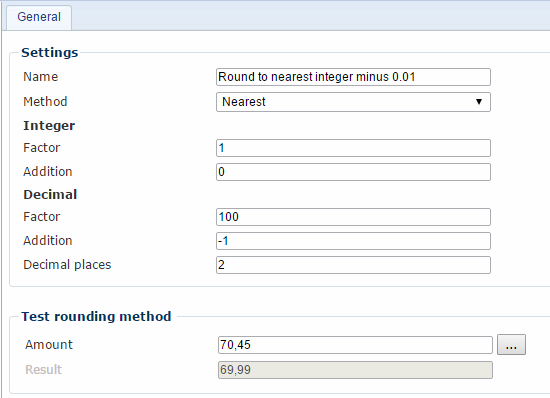
From here, you must:
- Name the rounding method – it’s a good idea to make the name descriptive of the method, since you will be selecting it based on the name only
- Select a method – up, down or nearest.
- Select a factor to round by and optionally an addition to add or subtract from the rounded price – for both integers and decimals.
- Specify the number of decimal places to include
Once a method has been saved for the first time, you will have access to the test-area. This is very useful!
To use the test area (and remove some confusion about the rounding rules):
- Enter an amount in the Amount-field
- Click the dots-button to see how the rounding method behaves
Once created, you can apply the rounding method to a currency by going to Management Center > Ecommerce > Internationalization > Currency, editing the currency, and selecting the rounding method.

Implementing
In this section you will learn about:
- Switching the language-, currency- or country-context through the query string
Query string parameters
Dynamicweb supports a number of query string operations for manipulating the internationalization settings:
| Parameter | Effect |
| LanguageID=LANG1 | Switches the language context to LANG1 |
| CurrencyCode=EUR | Swtiches the currency context to EUR |
| CountryCode=US | Switches the country context to US |


