
Automatic Image Processing
Any solution where users – whether frontend users or editors – can upload images to the file system will occasionally encounter users who insist on uploading an uncompressed 6000x4000 image of themselves or their cat. Over time, this can result in a significant drain on server space. To combat this you can activate automatic image processing for all images added to a specific folder. This ensures that images above a certain size are compressed and resized to a more manageable size.
To activate automatic image processing:
- Open a folder
- Click Image settings in the toolbar
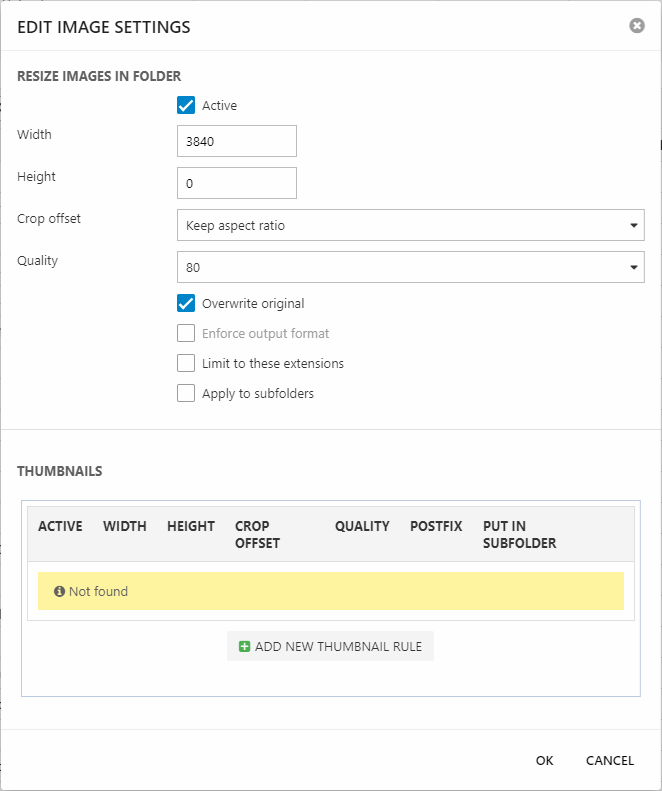
- Activate and configure the image settings (Figure 1.1)
The following processing options are available:
- Set a max width or height
- Select a crop offset and a compression quality
- Check one or more of the following options:
- Overwrite original – if unchecked, specify a postfix to add to the original filename after processing
- Enforce output format – enforce a particular output format, e.g. .png or .jpg. Only available if the original is not overwritten.
- Limit to these extensions – only process images with the specified extensions
- Apply to subfolders – applies the image processing to all subfolders
You can also auto-generate thumbnail images – but we recommend using the Image Handler tool to dynamically manipulate images when they are rendered instead.
You may also use the Dynamicweb Image Handler (getimage.aspx or getimage.ashx) to display dynamically manipulated images on your website, and keep the original versions as is in the file archive.