Custom Indexes
A custom index is an index containing data retrieved via an SQL statement – this is typically used to index custom data imported to the database from elsewhere without having to build a custom schema extender. It is not usually used for custom data which is already included in our various schema extenders, such as custom user fields, custom product fields, and so on.
To create a custom index:
- Go to Settings > Repositories and open/create a repository
- Click Add index in the toolbar
- Name it
- Click OK
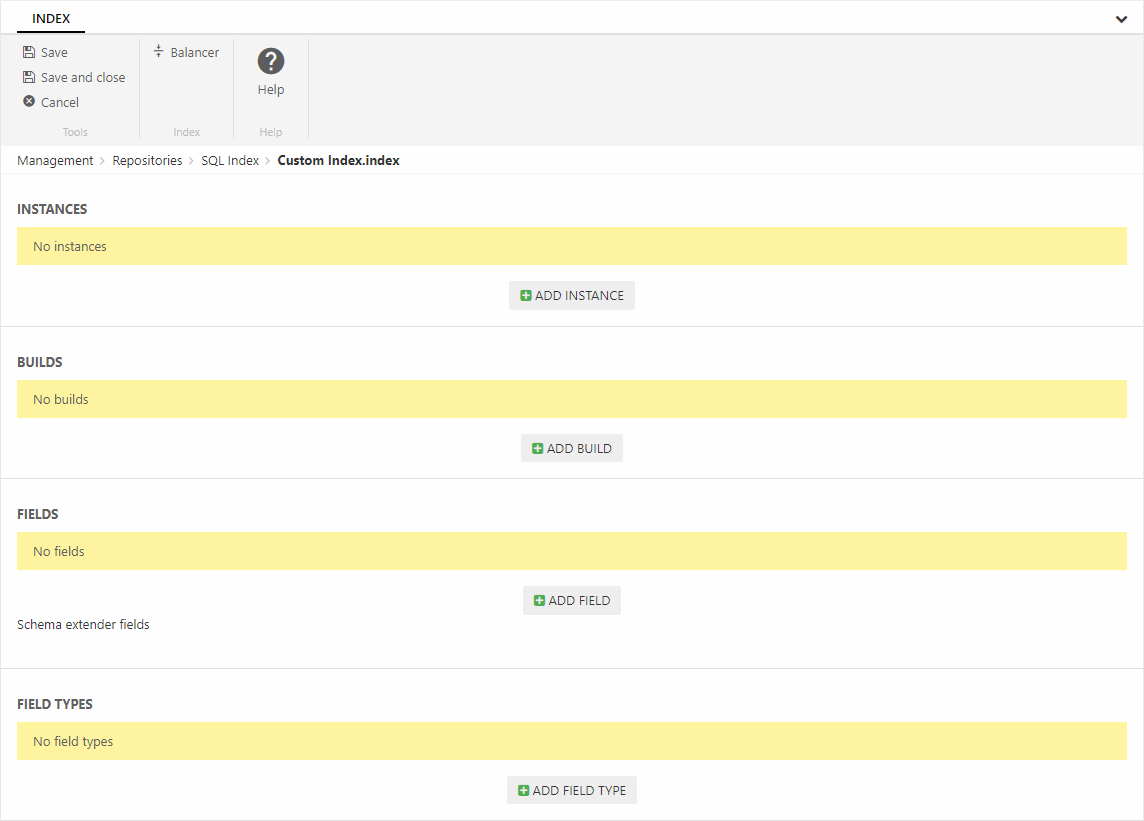
This creates an empty index (Figure 1.1) – you should now add instances to it.

Adding instances
An instance is a file in the file archive – it is this file which is being searched when a query is executed. Since instances are often rebuilt to make sure they contain the most recent changes to product data you want to create at least 2 instances. This ensures that there’s always an instance to search, even if one instance is currently being rebuilt.
Create two instances:
- Click Add instance
- Provide a name – you could call one instance ‘Custom A’ and the other instance ‘Custom B’
- Specify a folder to place the instance file under
- Click OK
Once created your instances will look something like:

When an instance is built, a set of index files are generated under System/Indexes/YourIndexName/YourInstanceName – but before you can build it you must create a build configuration.
Adding a build configuration
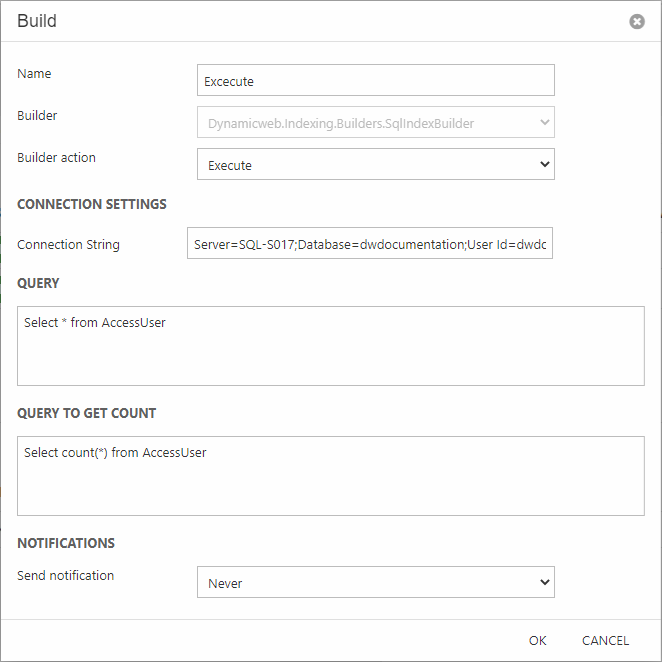
So now that you have two instances you want to build them – to do so you need to create a build definition. Each type of index has a specific builder associated with it – in the case of a custom index this builder is called the SqlIndexBuilder (Figure 3.1).

To use this builder:
- Click Add build
- Provide a name
- Select the SqlIndexBuilder
- Select a builder action – currently Execute is the only action available
- Specify a connection string in the format Server=myServerAddress;Database=myDataBase;User Id=myUsername;Password=myPassword;
- Specify a query which retrieves the columns and rows you want to index
- Specify a query which returns a count of the rows being added to the index
- Click OK
A setting – UseStoredProcedure – can also be set in the index XML config file. When set to True, the stored procedure name must be set in the “Query” setting which will be executed when running the builder to index the data.
Adding fields
Lucene indexes are composed of small documents, with each document divided into named fields which contain either content which can be searched or data which can be retrieved. Each field added to the index can therefore be stored, indexed, and analyzed depending on what you want to use it for:
- Stored fields have their values stored in the index
- Indexed fields can be searched, the value is stored as a single value
- Analyzed fields have their values run through an analyzer and split into tokens (words)
Generally speaking, a field you want to display in frontend must be indexed and a field where you want the user to search for parts of the value in free-text search must be analyzed. Field which are to be published using the query publisher should be stored. Fields you want to display as facets should be indexed but not analyzed.
Since the custom index is for custom data we do not have any default schema extenders for this type of index. Instead you can add fields to the index manually – see the Custom Fields article.
Building the index
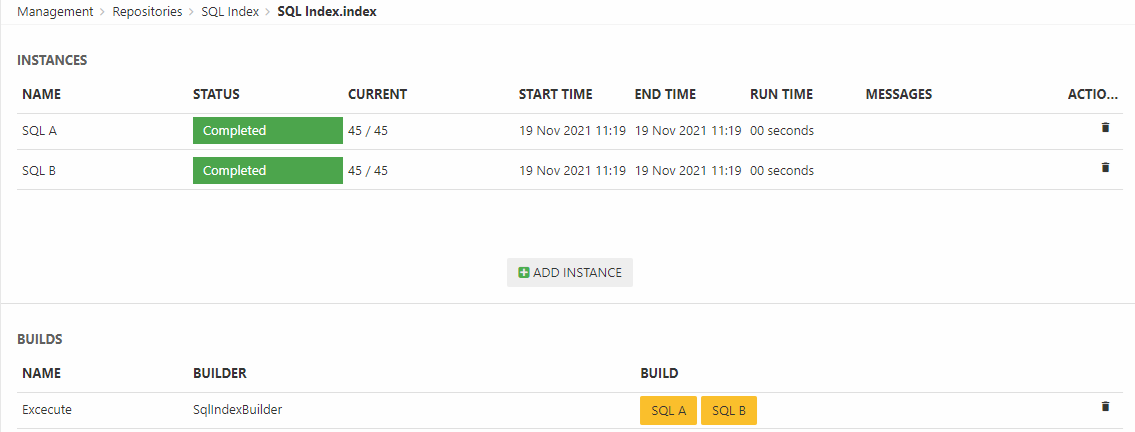
Once you’ve added instances, a build configuration, and a set of fields to the index you should build it – to do so click a yellow button with an instance name on it (Figure 5.1).

Of course, you don’t want to do this manually every time – you want to rebuild the index on a schedule – see the article on tasks.
If you have more than three instances defined you can also choose between two different balancing methods for selecting an alternative index when the primary index is being built:
- Click Balancer in the toolbar
- Choose between the two modes:
- ActivePassive selects the next instance on the list of instances – so if instance A is unavailable (building, has failed), instance B will be used unless it’s unavailable, in which case instance C will be used, and so on.
- LastUpdated selects the most recently built index
On solutions with heavy traffic and frequent product data updates we recommend using the LastUpdated mode to ensure that visitors are always shown the most recently updated product data. On solutions with only two instances (the vast majority of solutions) it is not necessary to select a balancer mode, as the “other index” will always be used when an index is unavailable.
