Remove, add or rename pages
Using the Swift B2C demo shop as a template for your own website, you’ll already have a bunch of different preset pages to customize. These can be found in the navigation folder in the content tree. You might be needing other pages or feeling that you have too many. This guide will explain how to either add, remove and hide pages.
In relation to removing pages or creating new ones we've made a guide about publication periods and scheduled publication. The guide for that can be found here.
Making new folders
Before creating any new pages, please pay attention to the organization of the pages in the content tree. Pages are divided into different folders by their content. Before you create a new page think of the content you want on the page and try matching it with an existing folder in the content tree. If you can’t find any matching folders, you should create a new one to keep everything neat and organized.
In this example we’ll create a new main folder within the Navigation folder.
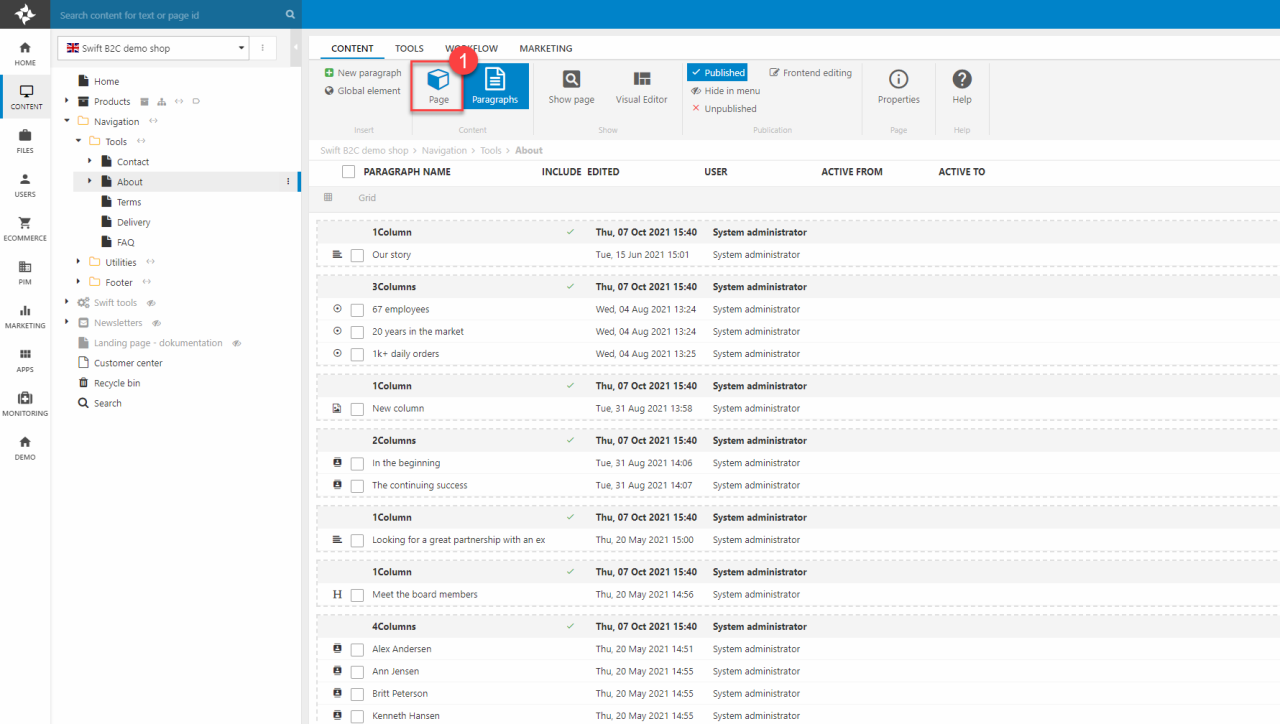
- Click the navigation folder.
- Click the three vertical dots on the right (1).
- Click “New folder” and give the folder a descriptive name (2).
Adding template pages
Should you want to add a new page, there are two ways to do it. Either you use one of the templates already existing and edit the content or you create an empty page and customize it from scratch.
Both ways are started in the same way:
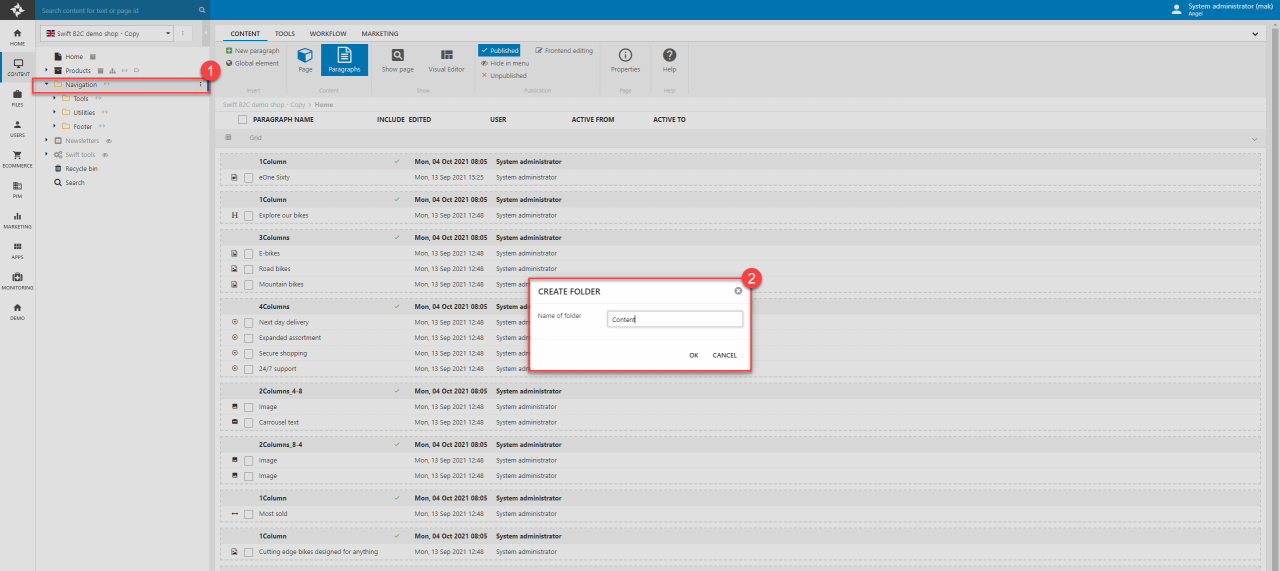
- First, you’ll need to think of where to place your new page.
- Navigate to the wanted placement in the content tree and click the preferred folder (1).
- Click the three vertical dots on the right and click “New page” (2). This will open a list of different templates. The easiest way to set-up a new page would be to choose one of these and edit text and pictures to your likening.
- Name the page according to your content and click “OK” to add the new page to the folder (3).
Adding empty pages
Should you want to create a page from scratch or use the page for redirecting the customer to external pages the beginning steps are similar to the ones above. Though instead of choosing a template page we’ll create an empty one.
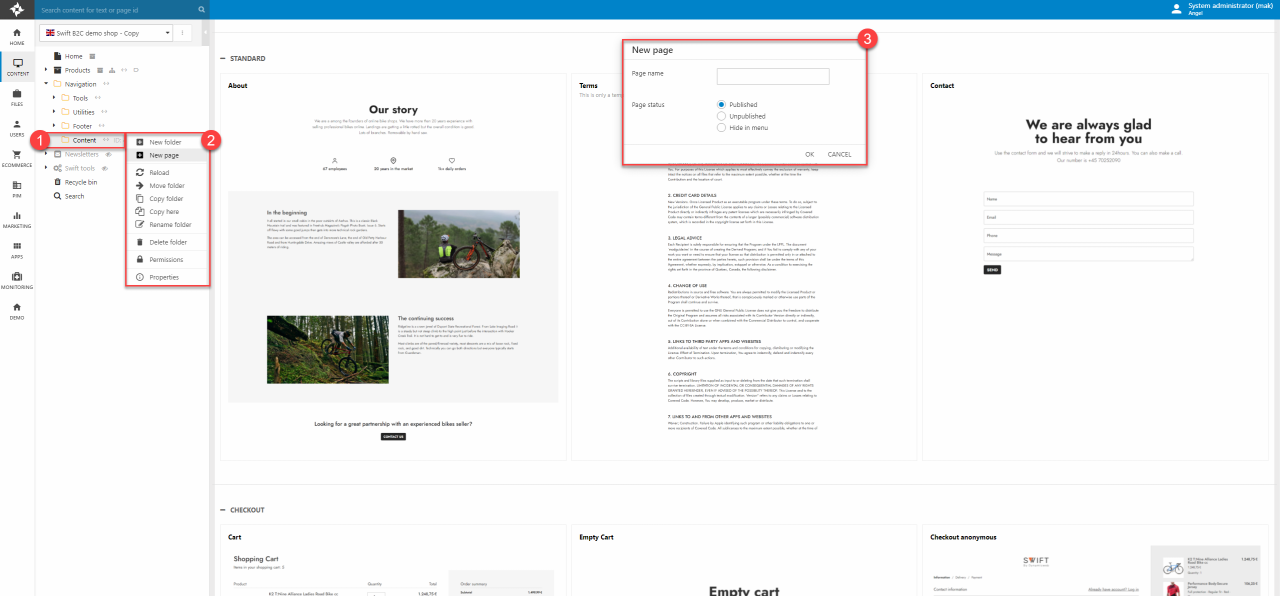
- Click on the wanted placement of the new page in the content tree and click three vertical dots on the right (1).
- Click the “Add empty page” (2) to unfold the drop-down menu.
- Click the page icon (3) and name the page according to your content or where you’ll be redirecting the customer to (4). Click “OK”.

Hiding or deleting pages
If you’re using the Swift B2C demo shop as a template for your page we’ve tried making the basic pages you should need. However, you could end up needing to hide or delete a page. Maybe you don’t have a LinkedIn page for your company, then naturally it shouldn’t be included in your Social links folder.
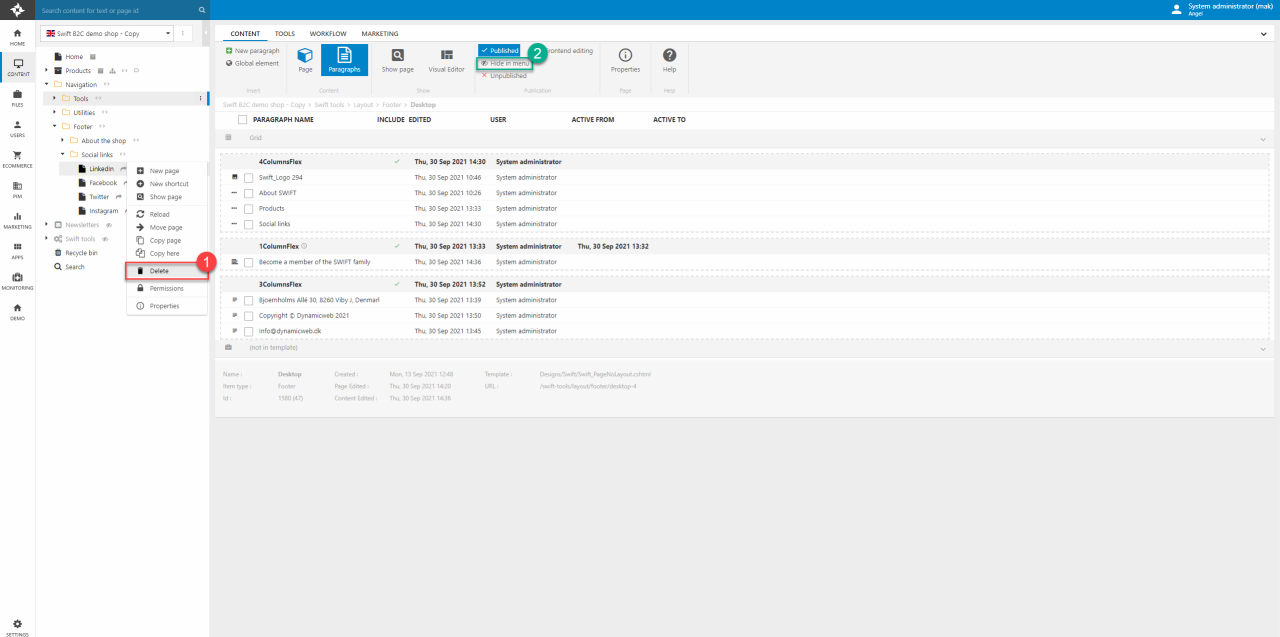
If you don’t want a specific page shown on your website (e.g., when using the navigation on your footer) you have two options: delete it or hide it (Figure 5.1).
- Deleting the page is easily done. Open the dropdown menu of the unwanted page by hovering it and clicking the three vertical dots appearing. After this click “Delete” and “OK”.
- To hide the page, you must enter the content of the unwanted page by clicking the page in the content tree. In the content pane you can change the publication settings of the page. Click "Hide in menu" and the icon will be hidden.
Renaming a page
Renaming a page is done in a few simple steps.
- Navigate to the page that needs renaming in the content tree and click on it.
- This will open the workspace of the page. Click the Page icon (1)
- Write the new name in the text field and remember to hit Save