
Product List
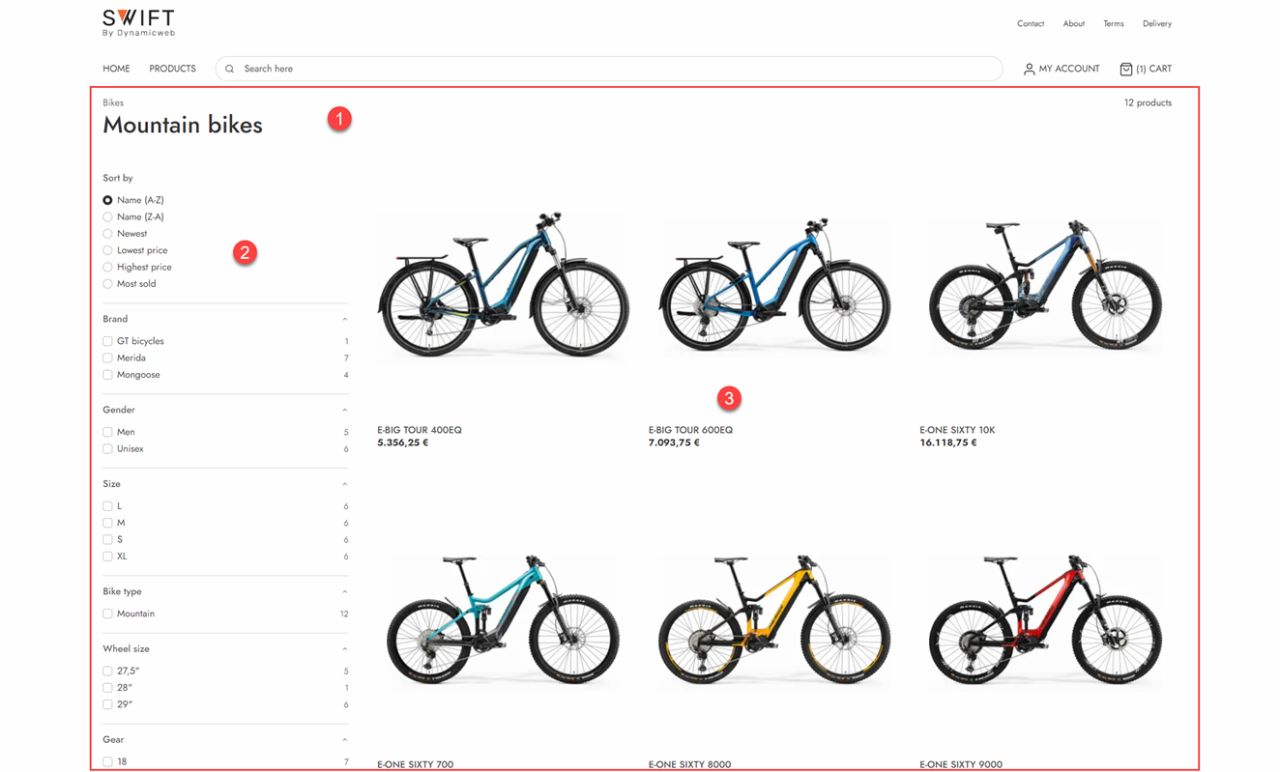
The Swift example website ships with a product list design which gives customers an overview of a specific subsection of products – here the category Mountain Bikes (Figure 1.1).
As you can see it consists of:
- A product list header with the group name and the product count (1)
- A facet list with product filters (2)
- A grid with product cards (3)
The backend setup for the Products page is a little unusual (Figure 1.2).
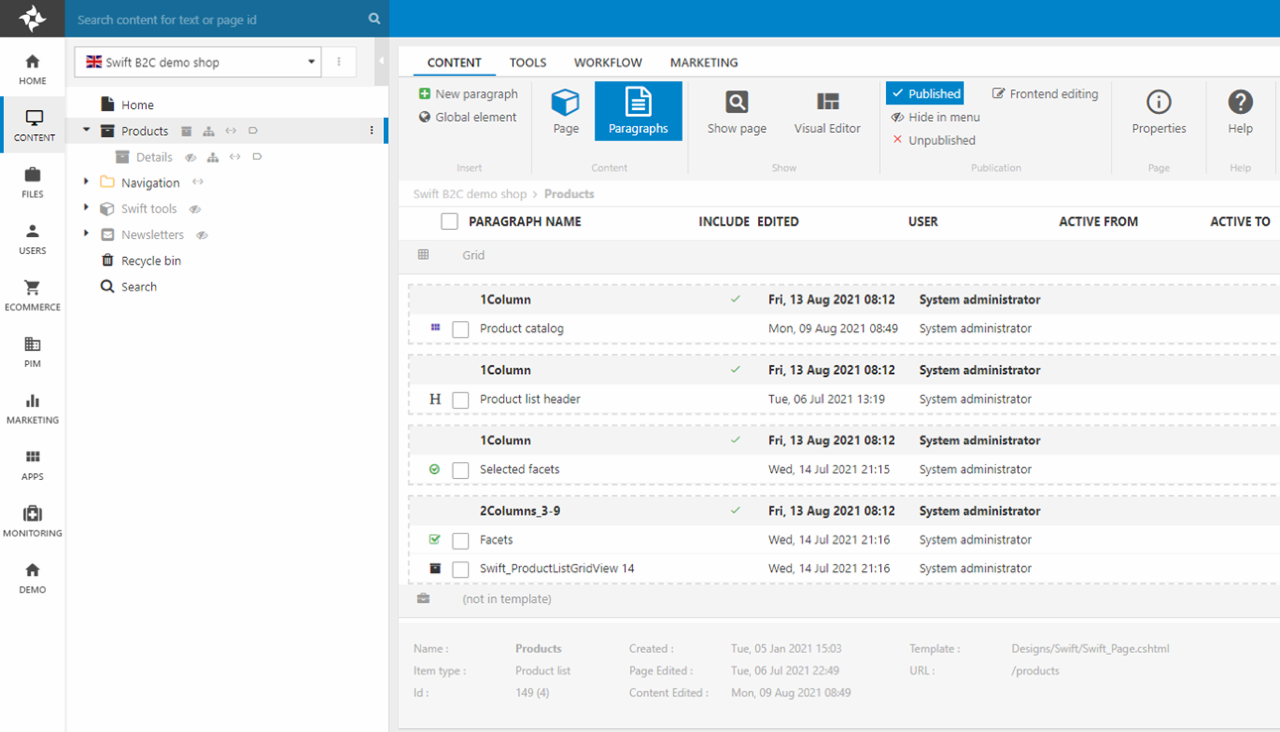
The page contains several content elements created using ecommerce columns:
- A Product Catalog paragraph containing a Product Catalog for ViewModel app which is used to:
- Make product & query data available to the rest of the page in an efficient manner
- Define which page will be used to show product details on when a product card is clicked
- A Product list header paragraph showing the top group & subgroup being browsed, as well as the total number of products returned by the query
- A Selected facets paragraph which shows the facets/filters currently selected
- A Facets paragraph which renders facets – on the item type you can specify which sort values to make available in frontend
- A Swift_ProductListGridView paragraph which renders the product grid – on the item type you can tweak the look and change e.g. the image aspect ratio or include more product data in the list view
They key thing to understand is that both paragraphs rendering frontend content – Facets and Swift_ProductListGridView – are dependent on the Product Catalog paragraph, and only render exactly the data which is necessary.
When you’re using Swift you therefore have three options when it comes to the product list:
- You can use the existing setup – in which case you don’t need to do much
- You can use the page presets as a starting point for creating a new product list page
- You can do a complete manual setup
Using the existing setup
While the existing product list design can be used out of the box, there are still certain steps to take to ensure that the right data is being shown.
- You must create the appropriate facets for filtering the products shown in the list. Once created they must be applied to the Product Catalog for ViewModel app on the Product Catalog paragraph in the standard manner.
- You may want to include product data from a field display group in the product list – if so, you should open the item settings for the Swift_ProductListGridView paragraph and select the field display group there.
Using presets
If you want to slightly modify the product list design you can create a new one using our page presets as a starting point (Figure 3.1).
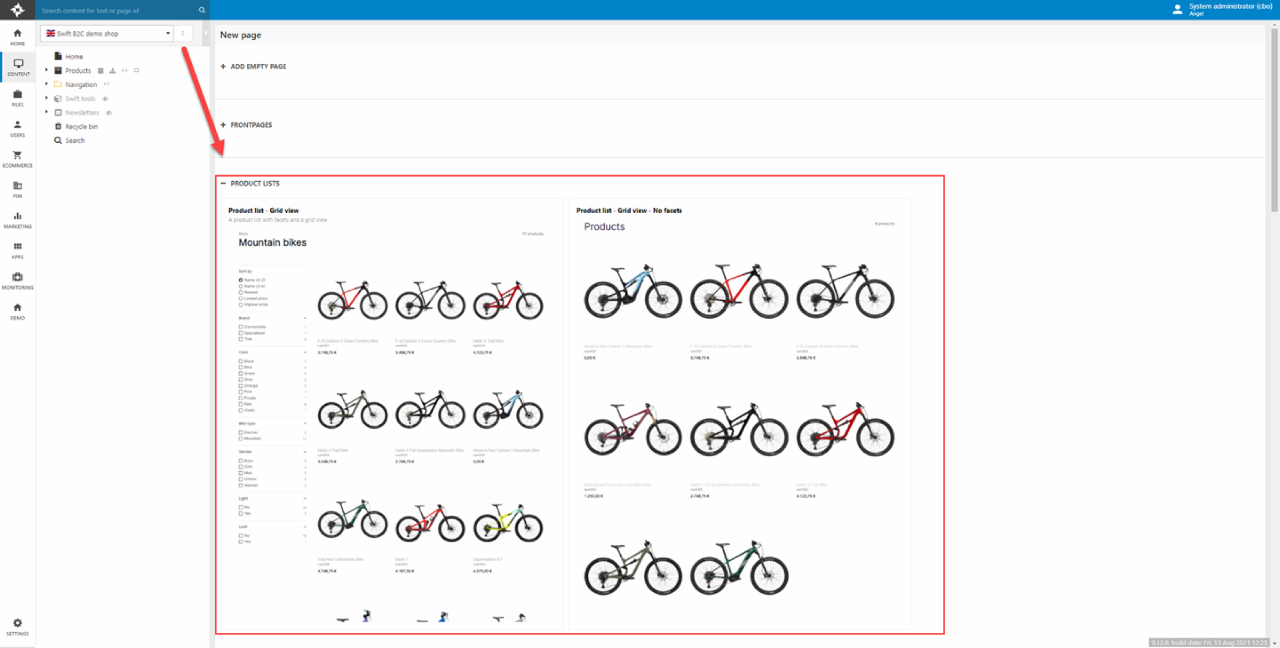
To create a product list page using page presets:
- Open the context menu for the root of the website and click New page
- Under the Product List section select a product list page preset (Figure 3.2) – these presets contain preconfigured sets of paragraphs for rendering a product list
- Modify the new page contents as you see fit
Manual Setup
If you want to setup the product list manually – or want to check if an existing setup is correctly configured – follow this guide.
First you must create the product catalog which all other item types on product list pages is dependent on for data:
- Create a new page using the Product list page type in the root of the website and call it e.g. Products
- Open the visual editor and add an empty row
- Add an empty column of the type Product Catalog app to the row – then configure it:
- Open the column settings and point the Details view setting to a page for rendering the product details view – if you don’t have this page created yet make sure you return to it later
- Click App and attach a Product Catalog for ViewModel app to it
- In the app select the Products query – this is the query which is used to control which products are shown and which reacts to e.g. search parameters and any facets selected
- In the app select any facets which should be available on this page
- In the app select the eCom/ProductCatalog/ProductViewList.cshtml template
Next you should set up navigation & urls:
- Close the visual editor and go to Properties > Options and open the Navigation-tool and configure it:
- Add the navigation tag Shop
- Enable Ecommerce navigation
- Select Shop under parent group – and select the appropriate shop
- Set a Max level – the example website has a max level of 3
- Set the Product page to the product list page you just created
- Under Properties > Options also open the URL-tool and configure it:
- Select the Ecommerce provider
- Under parameters specify how you want the URLs to behave
Once the paragraph delivering data has been created and the navigation and urls have been configure, you can create the paragraphs which render the facets & product list content.
This is done using the ecommerce columns for the product list– the following column types are typically used in different grid combinations:
- Product list facets
- Product list grid view
- Product list header
- Product list selected facets
If you want a more customized layout, we recommend using our product components.