
Hosting Environment
In this guide we will go through the process of preparing a hosting environment so that it is ready to host a Dynamicweb solution. The hosting environment could be a server or it could be you local PC - the process is the same.
You must:
- Install the relevant .NET framework versions
- Install a Microsoft SQL Server in a version matching the system requirements
- Install SQL Management Studio
- Activate Internet Information Services (IIS) on the machine
We will also cover the recommended way to organize things if you're hosting more than one solution on the same environment.
After completing the steps in this guide you can proceed to the Installing Dynamicweb article.
Install MS .NET Framework 4.6/4.7.2
Dynamicweb 9 requires Microsoft .NET Framework 4.6 to run - or from DW 9.7+ .NET Framework 4.7.2
- Go to the Microsoft download center
- Download the web installer
- Run it
You may or may not be informed that you already have the appropriate version installed on your machine – either way, you can move on to the next step.
Install MS SQL Server
You also need to install an SQL database server.
In this guide we will be installing an SQL Express server, which is limited to 2GB databases. This should be adequate for most local solutions, but if you want to move to production or work on large local solutions you should install a full SQL server.
This guide was originally written with MS SQL Server 2014 in mind, but currently we recommend using minimum v2016SP1.
- Go to the Microsoft download center
- Download the Microsoft SQL Server 20XX edition appropriate to your machine (32/64 Bit)
- Run the installer
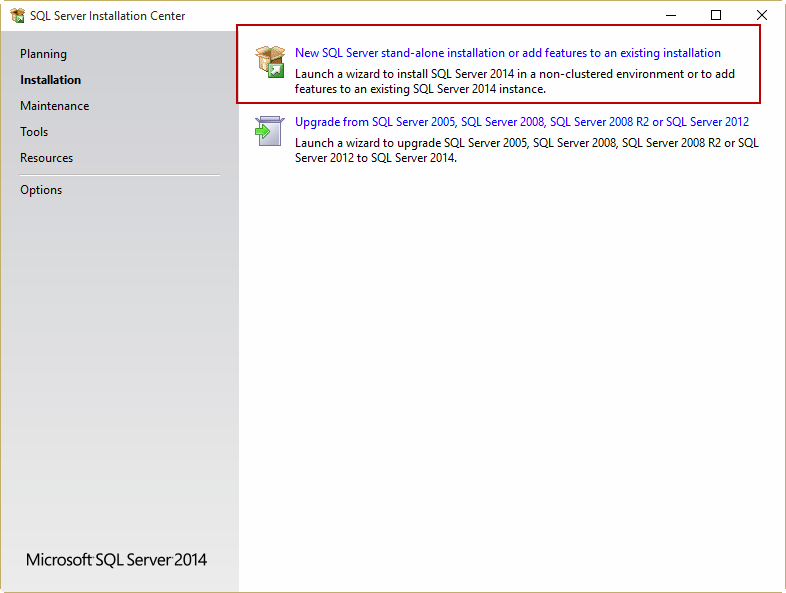
- Select a stand-alone installation (Figure 3.1)
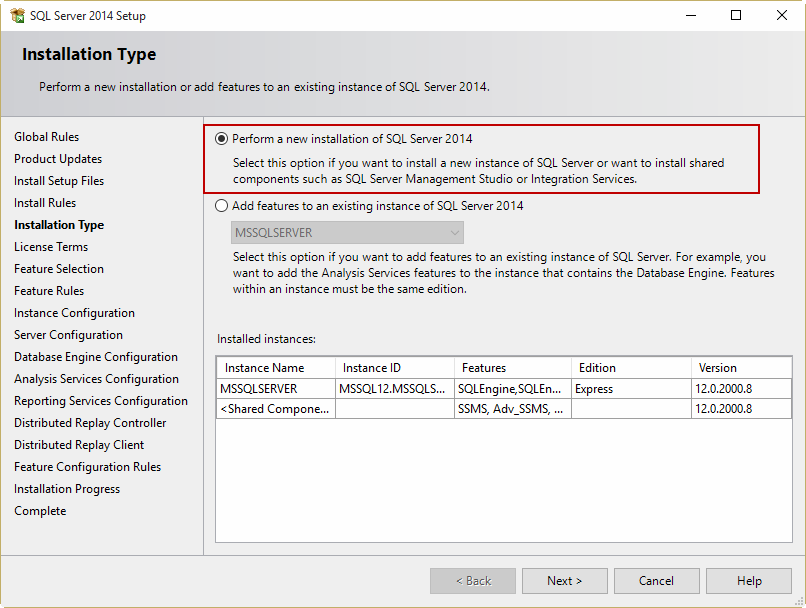
- Select Perform a new installation of SQL Server 20XX (Figure 3.2)
- Accept the license terms
- Leave the Feature Selection settings as they are
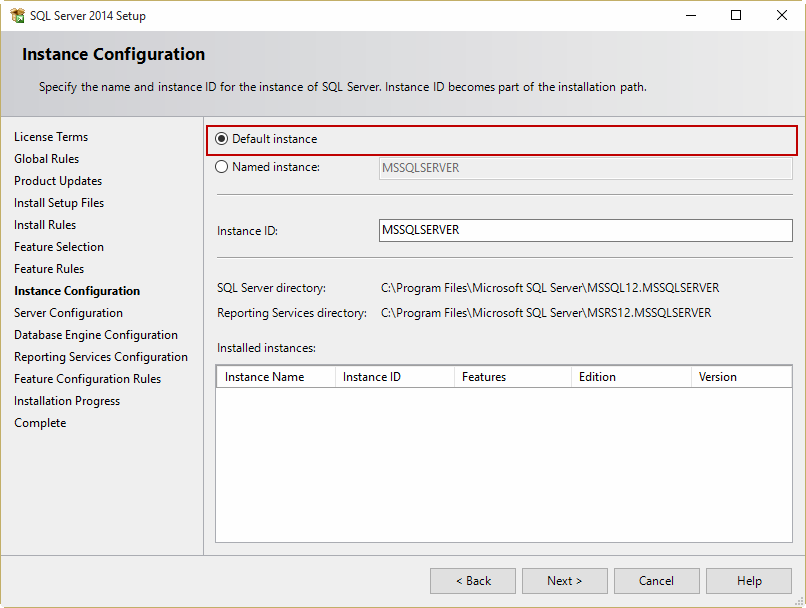
- Select default instance and click Next (Figure 3.3)
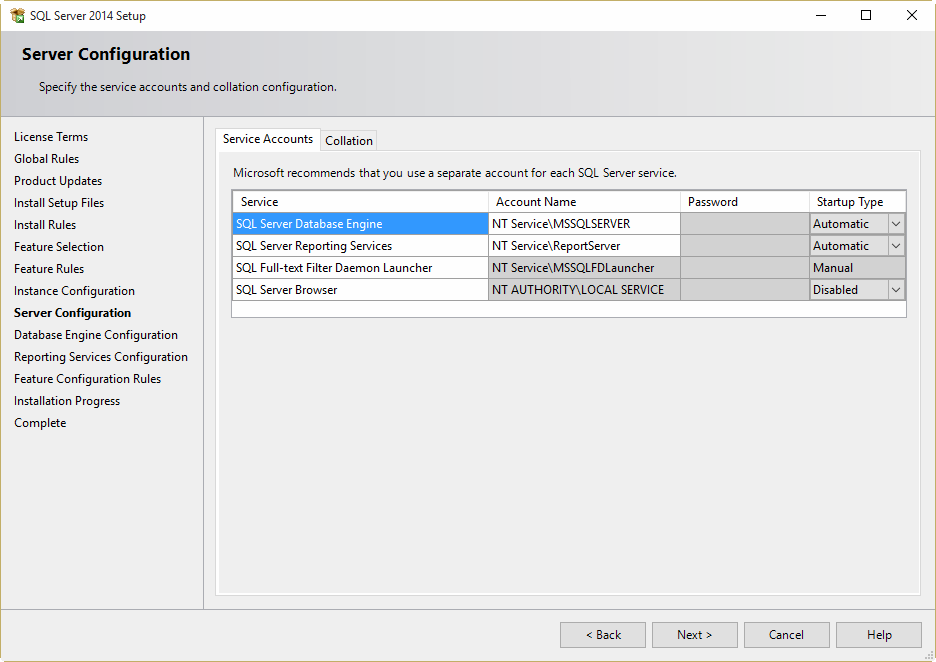
- Select SQL Server Database Engine under Server Configuration (Figure 4.1) (should be selected by default)
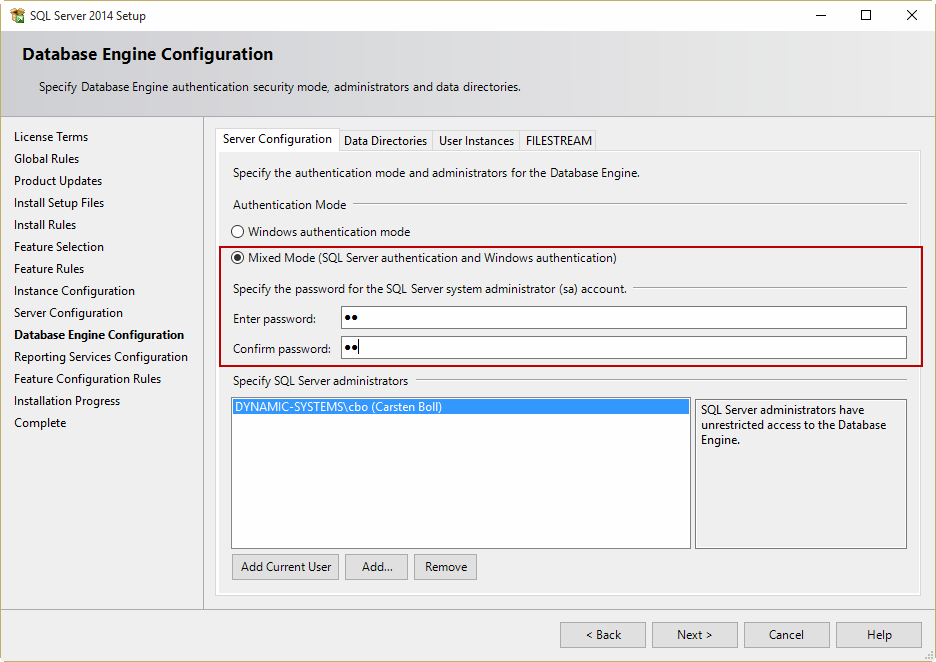
- Under Database Engine Configuration select Mixed Mode – and provide a password for the sa user (sysadmin) (Figure 4.2). (If your AD is configured correctly you can also use Windows Authentication mode – but that is outside the scope of this guide).
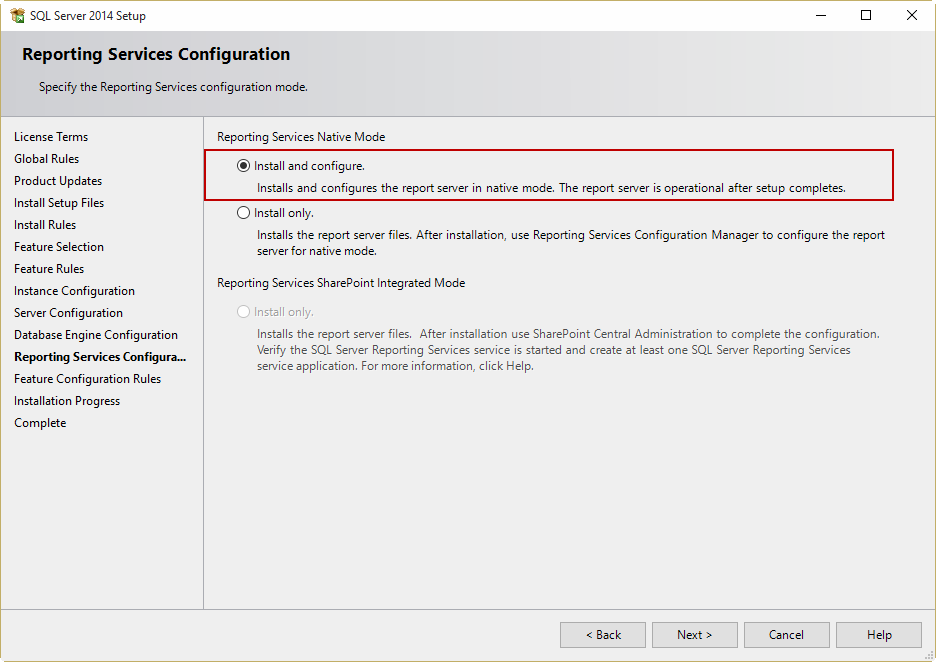
- Select Install and configure (Figure 4.3)
- Finish the installation
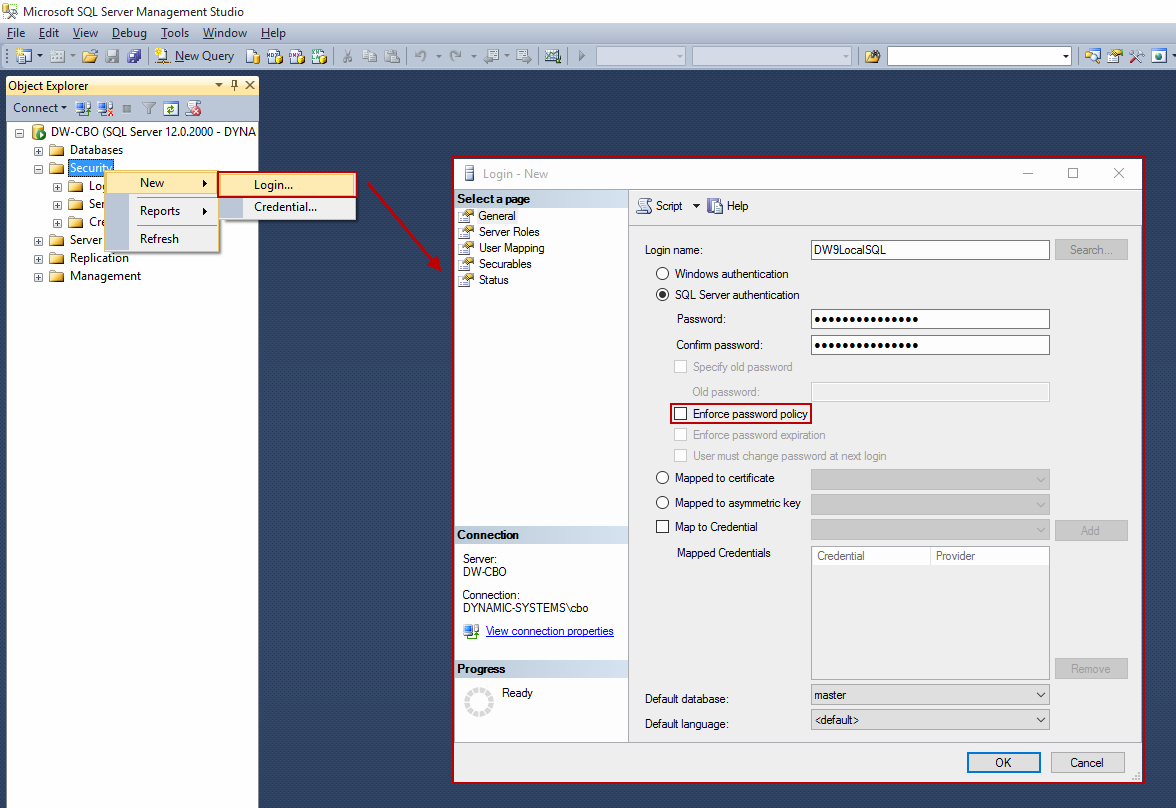
Create the SQL user
Next, you should create an SQL user with the right permissions for installing the Dynamicweb database:
- Open SQL Server 2014 Management Studio
- Right click the Security node and select New > Login
- Enter a login name for the user (Figure 5.1)
- Select SQL Server Authentication and enter a password and confirm it.
- Uncheck enforce password policy
Turn Windows Features On
Finally, you must make sure that you have the correct windows features installed and activated on your machine.
- Open Windows PowerShell
- Download and run this script
You are now ready to start the installation process.
Folders & Permissions
Before installing, let’s talk organization. In a typical set you want to create two folders:
- An Applications folder containing core applications
- A Solutions folder containing solution-specific files
Then, when the website is created in Internet Information Services (IIS) you can use virtual files directories pointing to the solution-specific Files folders inside the Solutions folder, making it trivial to switch to newer versions of the Dynamicweb application down the line.
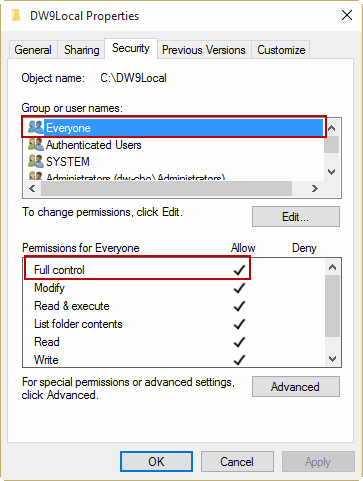
Please make sure that your user has full rights to both folders (or a top folder) – in a pinch you can add the user Everyone and give it full access (Figure 7.1)
You're now ready to install the Dynamicweb application.