
Authorize.Net API
As of 2020, VISA – the owners of Authorize.Net – have deprecated a number of older APIs such as AIM and SIM, which were used by two of our older checkout handlers; AuthorizeNet and AuthorizeNetAIM. If you use one of those two checkout handlers on your site you should migrate to this checkout handler instead.
Authorize.Net is a very popular payment provider available to businesses with a merchant account from an MSP (Merchant Service Provider) located in North America, Europe, or Australia. Please note that Authorize.Net only supports payment in US dollars.
You can setup a sandbox account here: https://developer.authorize.net/hello_world/sandbox.html
To configure the Authorize.Net API checkout handler you must obtain the following keys:
- API login ID
- Transaction Key
- Signature Key – see https://support.authorize.net/s/article/What-is-a-Signature-Key
- Public client key
Once these are obtained you can configure the payment method:
- Go to Settings > Ecommerce > Orders > Payments and create a new payment method
- Select the Authorize.Net API checkout handler
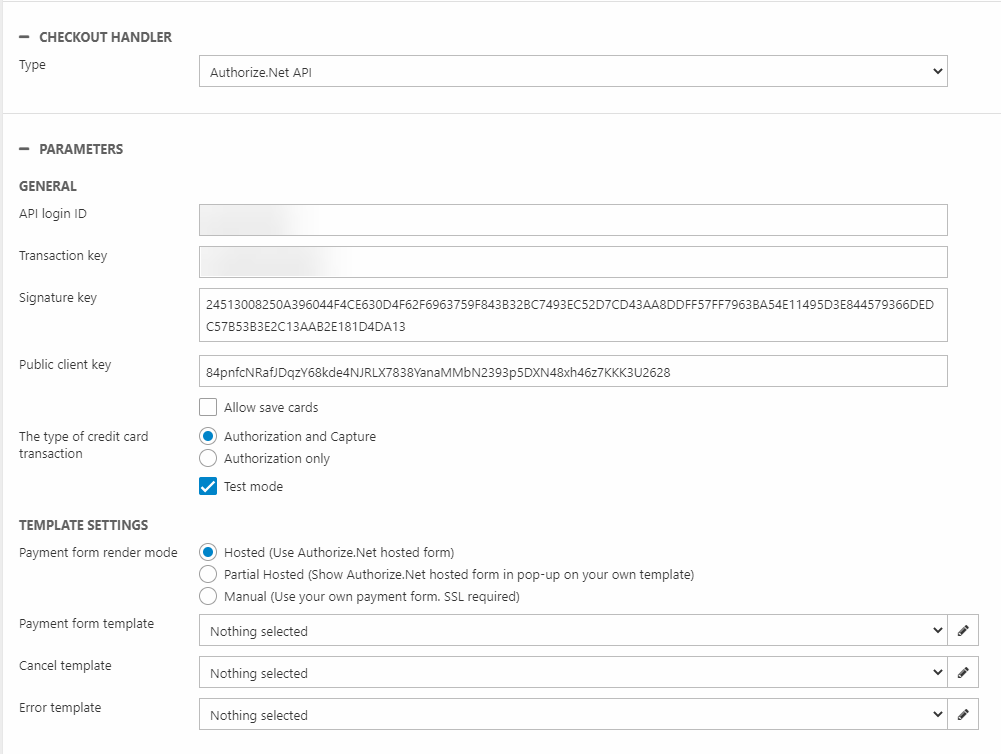
- Fill in the parameters section with the keys (Figure 1.2)
For a basic configuration:
- Supply the API login ID, the Transaction Key, the Signature Key, and the Public client key
- Check Allow save cards to allow user to save a credit card during checkout
- Select the type of transaction:
- Authorize and Capture
- Authorize only
- Check/Uncheck test mode
You must also specify how you want the payment window to be rendered:
- Hosted redirects the customer to Authorize.Net
- Partial shows hosted in a pop-up on your own template
- Manual makes it possible to use custom payment forms. This requires SSL, and you should create a set of templates:
- Payment form template
- Cancel template
- Error template
After configuring the checkout handler test your setup thoroughly. Authorize.Net supplies a testing guide with credit card information.